Why Wax Your Car?
You need to wax your car paint to protect it from the elements. It is constantly being attacked by the environment: UV light, brake dust, tar, bird poop, tree sap, acid rain, abrasion, hot metal particles from braking, stone and gravel impact, road salt, chemical fall-out,… and the list goes on…
These aggressive, destructive conditions will progressively break down your car’s clear coat or paint and render it dull, faded, brittle and prone to breaches and cracks which will eventually result in rust.
The solution to all this horror is to cover your car paint with a non-permanent, transparent sacrificial layer that will take the beating while protecting your clear coat or paint.
Waxing, Polishing, Buffing, Simonizing: What’s the Difference?
Polishing: Manual or mechanical (polisher) process using fine abrasives with the aim of removing scratches and roughness. Leveling a surface at a microscopic level to make it more reflective.
Waxing: Manual or mechanical (power waxer) process with the aim of adding a fine layer of non-permanent sacrificial wax to seal and protect the underlying material, coating or paint.
Simoniz was the most well known company commercializing and perfecting this technique nationwide, hence the expression “to simonize a car”.
Buffing: In the early days of detailing, polishing car paint was often called buffing. Nowadays, buffing is mainly used in the context of a final, last step in the polishing process by manually or mechanically very delicately polishing the surface to an ultra glossy shine.
Paste Wax vs Liquid Wax vs Spray Wax
If a quality wax is applied correctly it makes no difference if it is in paste form or liquid form. They should both perform equally.
Choose a paste wax if you like to keep the process authentic and don’t mind putting in a little more elbow grease.
If you’re looking for a faster, easier approach, go for a liquid or spray form.
A big downside to spray wax is that it leaves a thinner protective layer and is virtually impossible to apply in a controlled manner.
Especially with a little wind, wax is blown everywhere, which can be a pain. No matter the conditions, there will always be overspray. You’ll be waxing your garage floor too…
This can of course be solved by spraying the wax on an applicator or microfiber towel instead of directly on your car, but what’s the use of a spray wax then? Why not use a liquid wax instead?
Although spray wax may seem quicker, a liquid wax is more controllable and leaves a thicker protective coating, making it arguably the fastest and most effective way to wax your car with the least effort.
Check out our post about the best car waxes for our selection. We’ve tried and tested different types in a comprehensive review.
Here’s how to wax your car and get professional results:
How To Wax Your Car like a Professional Detailer
Preparation
1. Wash Your Car
The first thing to do before you wax your car is obvious: you need to wash your car very thoroughly to remove as much dirt and grime as possible.
2. Clay Bar Your Car
After you’ve washed your car, clay bar it to remove embedded impurities like tar, metal brake dust particles, road grime,… that won’t wash off.
Those contaminants will continue causing harm to your car paint underneath that wax layer if you don’t remove them first.
They might also work loose after you’ve waxed your car, leaving potentially thousands of car paint spots exposed to the elements.
3. Polish Your Car if Needed
Take the time to inspect your car’s paint for imperfections, scratches, swirl marks,… before waxing.
Chances are you need to touch up a stone chip here and there. Now is the right time to do this.
Watch out for any areas you’ve touched up. They should be allowed to harden for at least 3 days before they can be polished.
If you don’t have time to address these stone chips right now, put them on your to-do list for next time and continue.
If you find scratches or swirl marks you want to correct, polish your car paint in the problem areas or do a complete car polish to get your car paint to the next level. It’s the perfect moment now that your car is perfectly contaminant-free.
You want your car paint to be at its best before encapsulating it with a wax layer.
4. Everything you need to manually wax your car
Here’s How to Wax Your Car By Hand In 8 Easy Steps
The good news is that you’ve already completed most of the work, which is preparation. The next and final phase is to wax your car, which is quite easy and gratifying, actually.
Step 1: Read the manufacturer’s instructions
Read the instruction manual on the container, tube or bottle of wax you’re going to use. It is important to know that the following guidelines are general. In case of contradictions or doubt, you should always follow the manufacturer’s guidelines.
Don’t worry, as long as you proceed with a soft, gentle touch, you can’t go wrong. Wax coatings are very forgiving and can easily be corrected or even removed if needed.
We strongly recommend waxing by hand, not with a power waxer. If done right, a manual car wax is just as fast and effective. When waxing by hand there’s hardly any risk of scratching or swirls, no risk of burning the paint and you are much more “in touch” with your car coating.
Step 2: Put on some gloves
Put on a pair of nitrile gloves to avoid skin contact with chemicals and waxing agents.
Step 3: Decontaminate your car paint
First, decontaminate your entire car with a mixture of 50% water and 50% isopropyl, using edgeless microfiber towels.
A clean, degreased and decontaminated paint or clear coat is essential for optimal wax adhesion.
Step 4: Put wax on your applicator pad
Put a smear or a few dots of wax on the applicator pad. Don’t overdo it, a little goes a long way. Spread it out evenly over the entire pad with your fingers, wearing nitrile gloves.
Step 5: Start waxing in straight lines
Start with the car hood, it’s the easiest surface to monitor and to get a feel for the process. Gently but swiftly coat a quarter of the hood with your applicator pad. Work in straight lines, not in swirls, to minimize visible scratches.
Coat the same area again, but this time in the crosswise direction. The coated area should look greasy. Keep an eye on your applicator pad: if it gets too dry, add a smear or some dots of wax.
Step 6: Let it dry
While the wax dries to a haze, move on to the next quarter and repeat the same process.
Step 7: Buff the previous area in a swirling motion
Return to the previously waxed area and check if it is ready to buff: it shouldn’t look wet but slightly dull with a white haze.
From the moment that it has hazed up completely, gently buff it to a high gloss with your microfiber towel, this time in a swirling motion.
Fold your edgeless microfiber towel in half and again in half making it a handy size to work with. This way you have eight clean sides to one towel. When the towel is saturated, you can easily fold it to a clean side. Grab a fresh, clean one if all sides are saturated.
It is very important to keep a close eye on your microfiber towel because if it is saturated with wax, it won’t optimally buff.
Drying times vary between different types of waxes and depending on air humidity and ambient temperature. Consult the instructions manual.
If the wax hasn’t completely hardened yet, start waxing the next area and return afterwards.
Don’t worry if you’ve waited too long to buff the wax, the worst that can happen is that it has completely hardened. This just means you will have to buff a little longer to get that perfect shine. No harm done!
You will perfect your timing as you go.
Step 8: Continue
Continue this process an area at a time until you’ve waxed your entire car.
How To Power Wax Your Car
If you feel very confident about your buffing skills, you can also use a power buffer or polisher to speed things up.
Although it is tempting to cut some corners (pun intended), it’s important to know that a power buffer removes much more wax than manual buffing does. Meaning that the protective wax layer won’t last as long.
To counter this, professional detailers often use a power buffer to wax a car in multiple layers. They do this to build up a thicker, longer lasting film. They also do this to fill in, level or equalize car paint imperfections to make them less visible.
This multilayer technique renders gorgeous concours-winning results, but it is not more time-efficient than the one-layer manual approach, of course. Quite the opposite.
We have to inform you that although it is low, there is risk involved with power waxing, contrary to the manual approach: Too high RPM, too much pressure or polishing with a dry pad for too long in the same spot may result in irreversible paint damage or scorching.
For all these reasons, we strongly recommend waxing by hand, not with a power waxer. If done right, a manual car wax is just as fast and effective. When waxing by hand there’s hardly any risk of scratching or swirls, no risk of burning the paint and you are much more “in touch” with your car coating.
However, don’t let this scare you, if you follow instructions and use common sense you’ll be just fine:
Everything you need to power wax your car
- nitril gloves
- car wax
- car buffer
- buffing pad
- pad conditioning brush
- 4-8 edgeless microfiber towels
- isopropyl alcohol
- car wax applicator (optional)
Here’s How to Power Wax Your Car In 7 Easy Steps
Of course, first prepare your car paint just like you would if you were to hand-polish your car, then proceed:
Step 1: Read the manufacturer’s instructions
Read the instruction manual on the container, tube or bottle of wax you’re going to use. It is important to know that the following guidelines are general. In case of contradictions or doubt, you should always follow the manufacturer’s guidelines.
Don’t worry, as long as you proceed with a soft, gentle touch, you can’t go wrong. Wax coatings are very forgiving and can easily be corrected or even removed if needed.
Step 2: Put on some gloves
Put on a pair of nitrile gloves to avoid skin contact with chemicals and waxing agents.
Step 3: Decontaminate your car paint
First, decontaminate your entire car with a mixture of 50% water and 50% isopropyl, using edgeless microfiber towels.
A clean, degreased and decontaminated paint or clear coat is essential for optimal wax adhesion.
Step 4: Put wax on your applicator pad
Put a few dots of wax on your hand- or power waxer applicator pad. Don’t overdo it, a little goes a long way. Spread it out evenly over the entire pad with your fingers, wearing nitrile gloves.
Make sure the whole pad surface is wet with wax, especially when using a power waxer. Wax acts as a lubricant, protecting your car paint from scorching or scratching during the power waxing process.
Step 5: Coat your car with car wax
Coat your car with car wax in one go, using a manual car wax applicator or using your power waxer, set at low speed. Apply only very light pressure with both methods. Wax in straight or crosshatch lines, instead of in swirls, to minimize visual scratches.
Frequently add wax to your pad so it stays sufficiently lubricated.
We think the easiest way to apply car wax is with a manual applicator pad, because a manual applicator pad can go where your power waxer can’t and is easier to control.
You’ll have to wax hard-to-reach spots like around door handles and rearview mirrors, or around trim, grills, logos and badges by hand anyway. A power waxer would damage them or fill them with wax residue, which can be hard to remove.
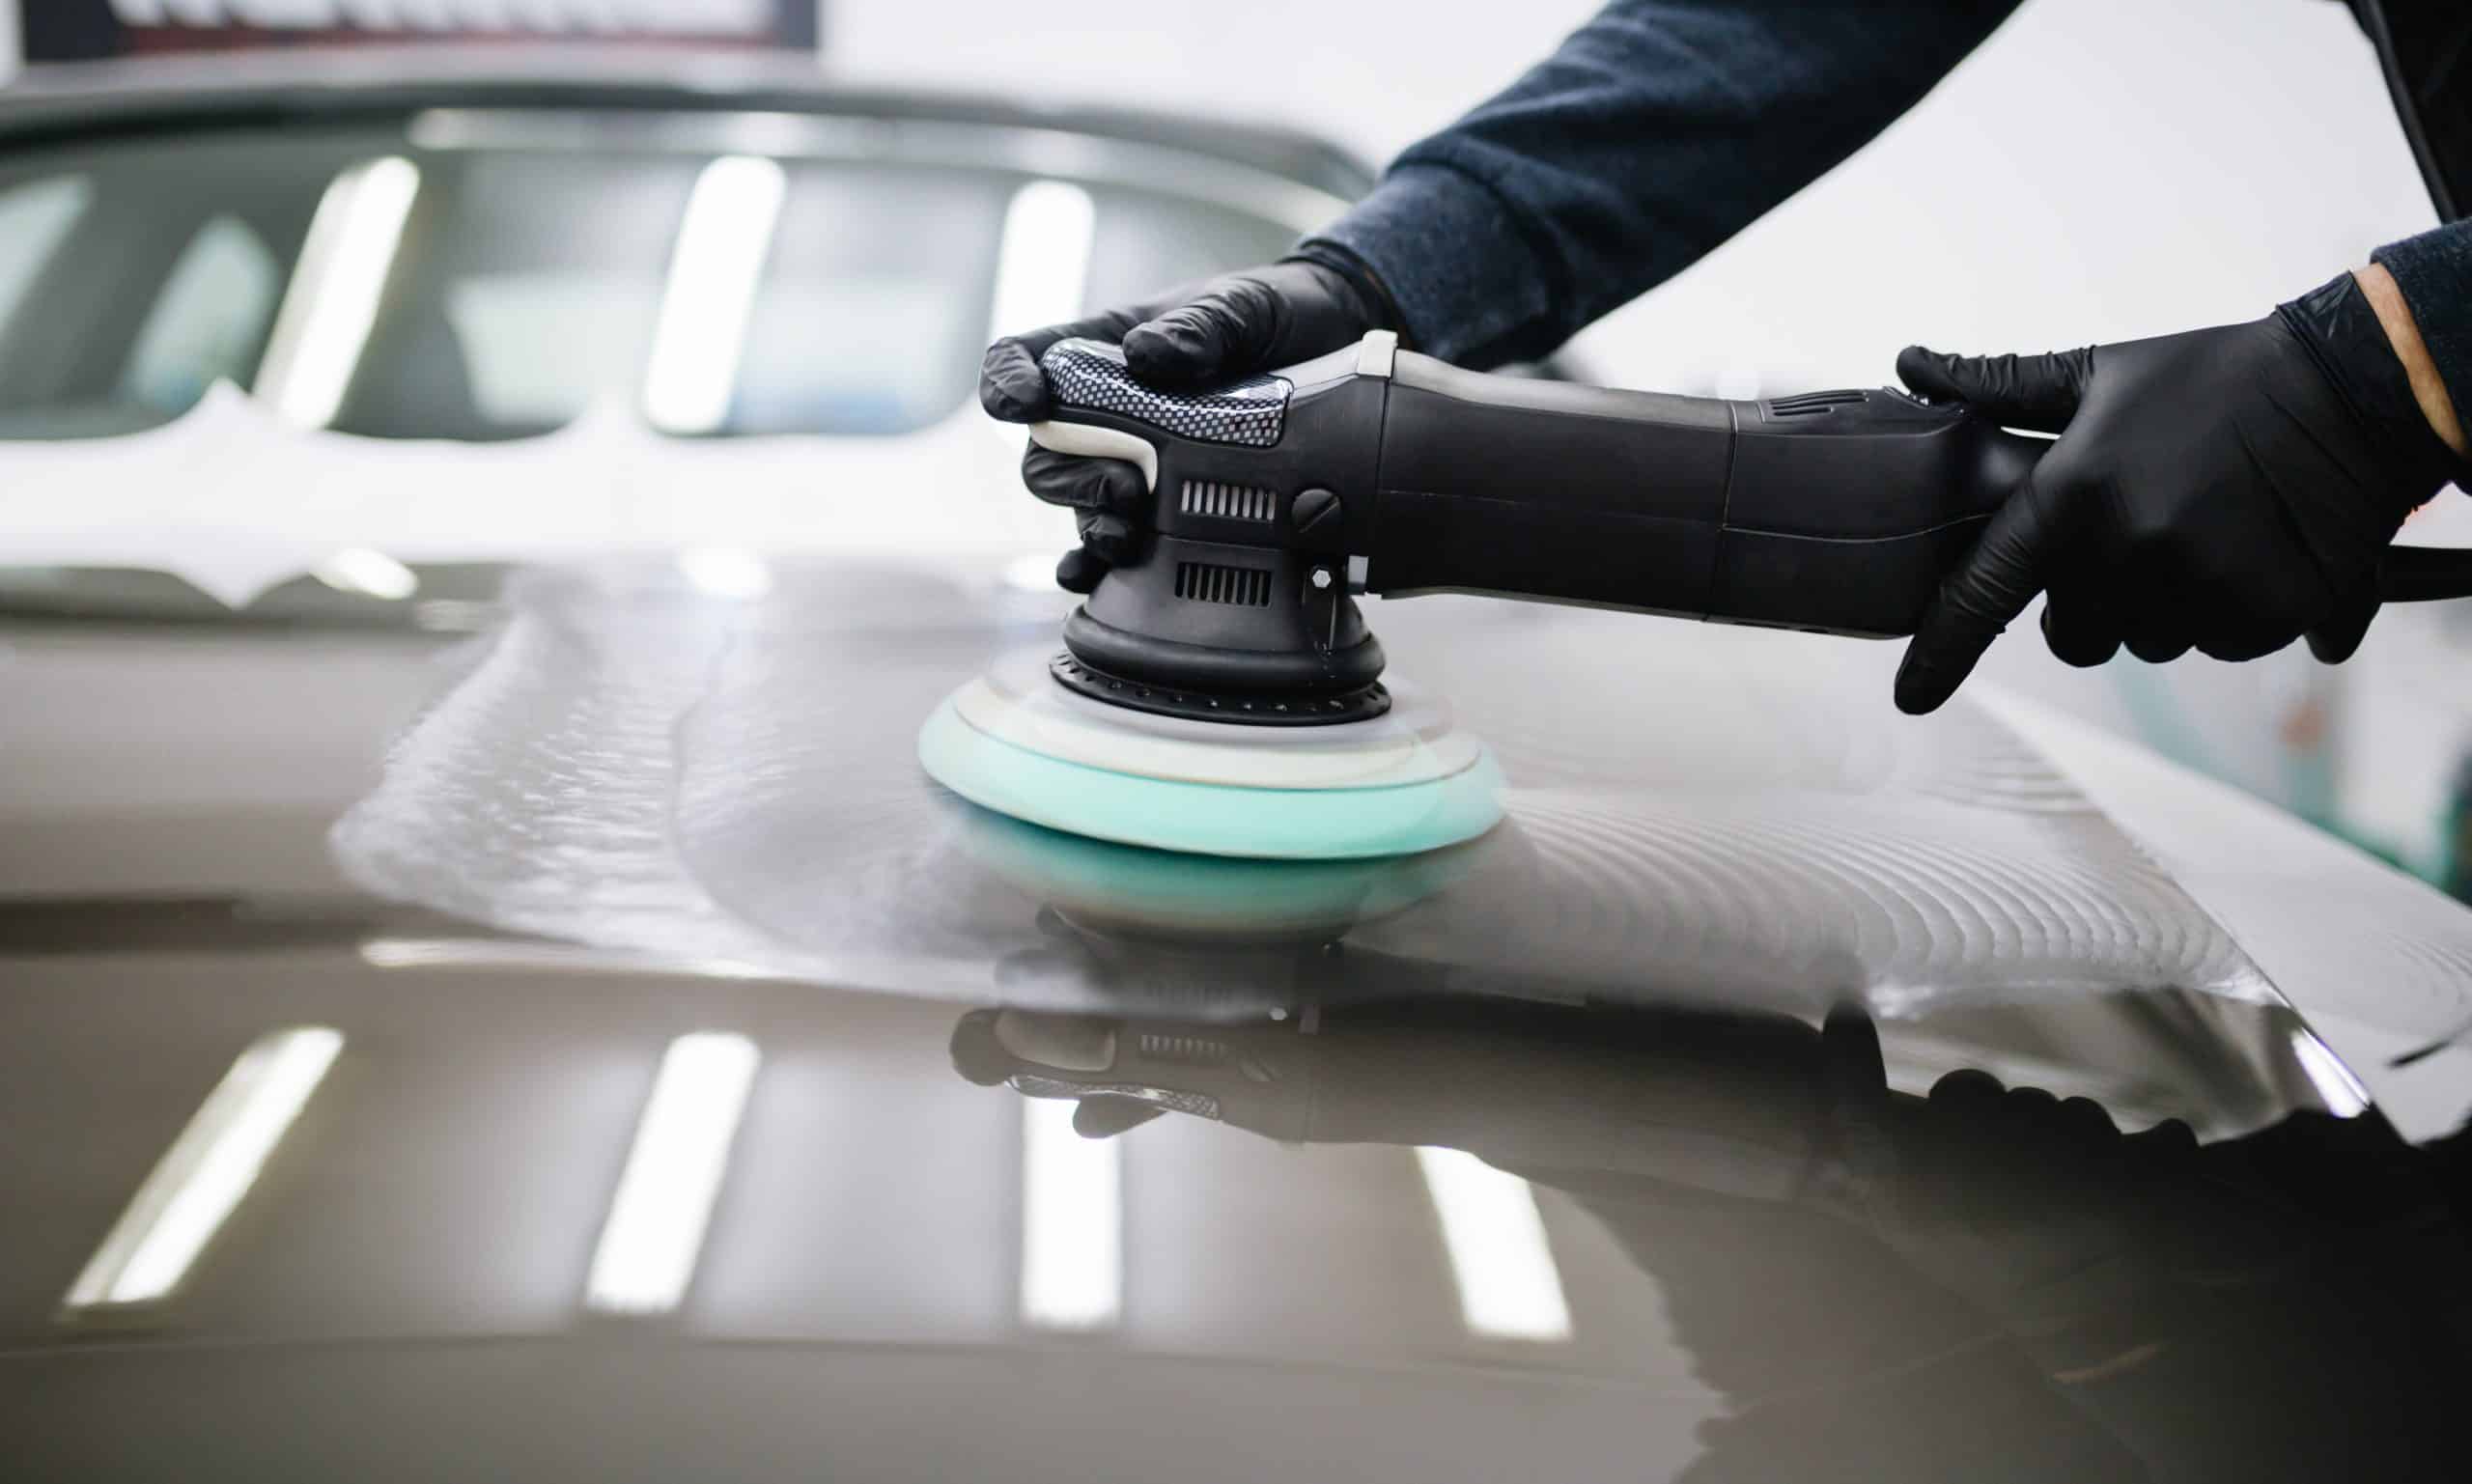
Step 6: Buff your car with a power buffer
When the wax layer has dried to a haze, you can start buffing your car. Use a soft buffing pad with your power buffer set at medium speed. Keep it moving, don’t hold it stationary to prevent heating or scorching your car paint.
Frequently check your pad. If it gets caked up with wax, clean it with a pad conditioning brush. Hold the brush against the pad at the lowest speed setting to remove the wax, add fresh wax and continue buffing until you’ve done your whole car.
Step 7: Finally, buff with an edgeless microfiber towel
Finally, give your car a quick once-over with some clean edgeless microfiber towels to remove wax dust and to get a uniform gloss. Manually buff the tight spots where your power buffer couldn’t go.
Congratulations, you’re done!
There are few things you can do to improve your car that are so rewarding.
Go comb your hair in the reflection… Good job!
Happy detailing!