Most people are out of their depth when it comes to using an air compressor and air tools. They think it’s complicated and only for professional use, when it’s really not.
In this step-by-step guide we’ll show you how to set up, use and shut down an air compressor. You’ll be ready to use a whole array of air tools from a simple stapler to a large capacity paint gun in a safe and controlled manner. That air compressor will come in handy too when you want to inflate your vehicle’s tires, pool stuff or a soccer ball. You’ll be amazed how versatile an air compressor is…
Right, the pressure’s on (pun intended), let’s get started!
Things you might need:
- Safety glasses
- Ear protection
- Air compressor
- Air hose
- Water separator
- Couplings and plugs
- Air tool(s)
- Air pressure regulator (often included with air compressor)
Here’s a step-by-step guide “How to use an Air Compressor”
Step 1: Put on your safety glasses
Although compressed air is perfectly safe when you use it with common sense, it’s highly advisable to wear safety glasses and ear protection while working with air tools.
Step 2: Prepare Your Air Compressor
Securely position your air compressor on a flat, level surface.
Before using your air compressor, you want to first check the oil level and add oil if needed. This only applies to oil-filled compressors, most of the small size budget compressors are oilless or oil-free and don’t need oil or maintenance. You want to check your user manual to make sure.
Another way to tell if your compressor is oil-free or oil-filled is to look for a sight glass that is usually situated on the lower end of the crankcase and/or a dipstick located on top of the crankcase. The crank case is situated under the cylinder(s). The cylinder(s) can easily be recognized by their large metal cooling ribs.
A sight glass is a tiny round glass window that allows you to see inside the crankcase and check the oil level. If your air compressor has a sight glass and/or a dipstick, it is oil-filled for sure. In most cases the oil level should be halfway the sight glass and/or the dipstick should indicate “max”. If the level is below halfway on the sight glass or below the “max” level on the dipstick, you should first add some oil. If it’s OK, you’re good to go.
Again, check your manual first.
Step 3: Connect the Air Hose
Before connecting an air hose to your air compressor, you want to first check compatibility. Make sure to connect the same type of air hose plug to your compressor’s air outlet coupling or they might not connect or not be air-tight. Chances are you will also damage the coupling trying to connect a wrong type of plug.
Although there are several types of fast connectors, the two most commonly found in the USA are the industrial and the automotive air line couplers. They are however not compatible. To be safe, check your air compressor and air hose specifications. Both your compressor’s air outlet coupling, the air hose connectors and your tool’s couplers must match. If they don’t, you will have to change the couplings so they match.
Once you’re sure they match, you can connect them and check for air leaks. It’s very simple to connect a quick connector: pull back the female coupling’s metal collar and insert the male plug firmly. Release the collar and it will click back in place and secure the airtight connection. The male side of the air hose connects to the air compressor, while the female side connects to the air tool.
Step 4: Turn On Your Air Compressor and Adjust the Air Pressure
Plug your air compressor into a mains socket and turn it on. The air compressor will build pressure in its tank up to the maximum factory preset. When this maximum pressure has been reached, it will automatically shut off. When pressure drops beneath the minimum factory preset when you use your air tool, it will turn back on.
These presets are controlled by the air compressor’s pressure switch which cannot be adjusted for safety reasons. In the unlikely event that the pressure switch should malfunction and build too much pressure, a safety release valve will automatically open and release excess pressure.
This means that air tank pressure fluctuates between minimum and maximum pressure continuously when in use. The air compressor will switch on and off accordingly.
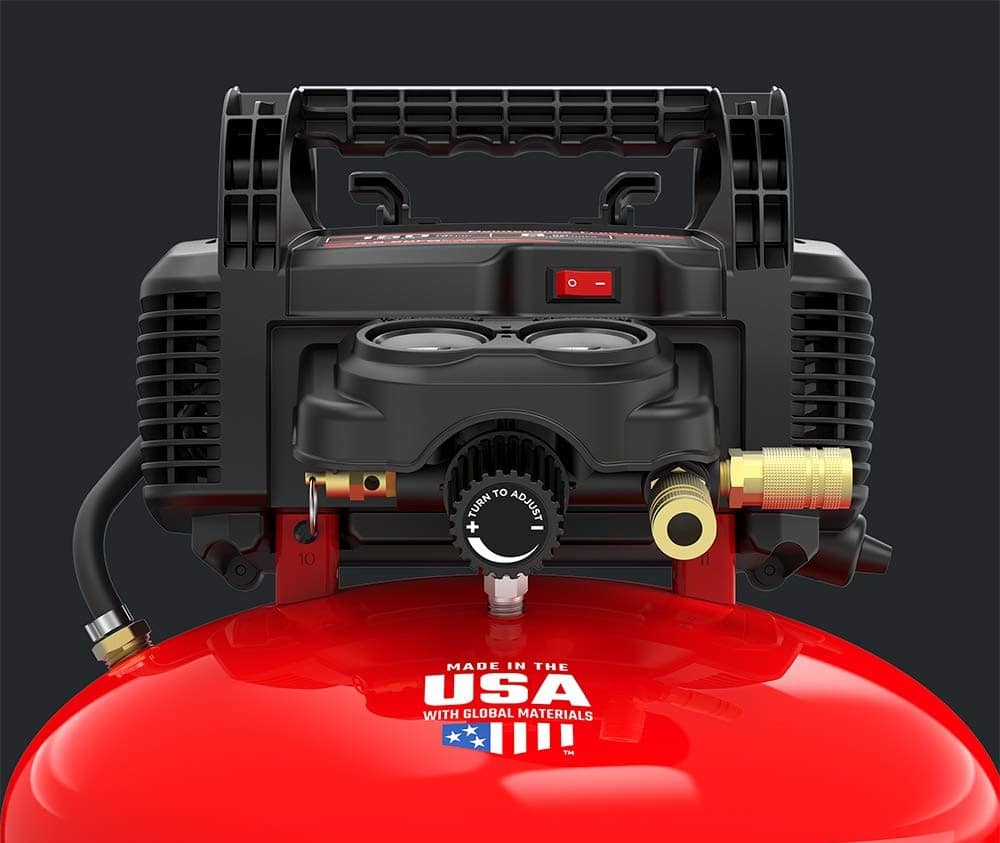
To guarantee constant air pressure, you can adjust the air compressor’s pressure regulator according to the requirements of the air tool you’re going to use. The tool’s maximum air pressure can be found on the tool itself or in its user manual.
The air pressure regulator has a pressure gauge with a red adjusting knob on top. By turning this knob, air pressure can be increased or decreased regardless of air tank pressure. Up to the maximum pressure limit, of course. Actual working pressure can be read on the pressure regulator gauge face.
Step 5: Use the Air Tool
TIP: Before each use, it’s recommended to put a few drops of air tool lubricant in the air tool’s air inlet before connecting it to the air hose to lubricate the tool’s internals and protect its moving parts from internal corrosion. Check your air tool’s user manual for further specifics.
This recommendation does, of course, not apply to air guns or paint guns of any kind, because oil droplets or oil mist would shoot out and contaminate your work.
With the air compressor providing constant, correct air pressure and your air tool and air compressor snugly connected to the air hose, you can start to use the air tool according to its instructions.
It is highly recommended to install a water/contamination separator between your air compressor and your air hose(s) to prevent water, oil and other contaminants from entering your air hose and tools. The water will lead to corrosion in your tools and the oil and contaminants will ruin your spray paint work.
The oil particles are a side product from the air compressor’s internal lubrication process. Water and contaminants come from the outside air that is sucked in and compressed. This is unavoidable and the only way to prevent this is to filter the compressed air before it reaches your air hose. That is exactly what a water/contamination separator does.
You’ll be surprised how much water, oil and contaminants a separator collects!
Step 6: Monitor the Air Pressure
You want to check the air pressure once more while the tool is in full operation. More often than not, air pressure will drop when you’re working. When air pressure drops too low, the tool will not operate at full capacity.
Adjust the air pressure regulator to the desired pressure under load, meaning when the tool is working. Now you can continue while the air compressor maintains air pressure automatically.
Don’t forget to adjust air pressure when changing your tools!
When you use multiple tools simultaneously that require different air pressure settings, you will have to install a pressure regulator for each pressure hose.
Step 7: Shut Down the Air Compressor
When you’re done working, turn off your air tool. Also turn off your air compressor and unplug it from the wall outlet.
Disconnect all hoses and tools by pulling back the quick connector’s metal collar. Hold both ends firmly while it disconnects with a pop. All quick connectors have an internal valve that shuts off air pressure immediately. However, the compressed air in the air hose can release some pressure at the male end with a slight hiss. Always point it away from you and other persons in the room before disconnecting it. Safety first!
For well maintained air compressors it’s fine to store them under full air pressure, and you don’t have to release air pressure before storing them. That saves time, work and electricity too.
However, you want to drain the air tank by opening the drain tap until nothing but air comes out, then close it. This prevents internal water and dirt buildup at the bottom of the tank with possible corrosion as a consequence.
If you have a water/contamination separator installed, drain it too.
Check your air compressor’s manual and always follow the manufacturer’s instructions.
Now you know how to use an air compressor, you’ll enjoy working with this versatile tool! It makes a lot of DIY jobs much easier, faster and more enjoyable! For advice on which air compressor to buy for your specific needs, you might want to take a look at our “Best Air Compressors for Home Garage”.