In order to keep your car in optimal condition, make it last longer and keep you and your passengers safe, it is important to routinely do essential car maintenance. It’ll minimize car breakdowns, keep down maintenance costs and maximize your car’s resale value.
We’ve listed all the things you don’t want to overlook and the things you want to check in order to enhance your overall driving experience and boost your confidence. We’ve also included short and easy how-to’s to guide you in that process.
This checklist can save you a lot of money by keeping an eye on your car dealership’s maintenance routines too and avoid unnecessary repairs and fluid changes. If you’re a hands-on person, you can even use this checklist to do some or most of your car maintenance yourself. This can save you up to thousands of dollars per year!
These are the 15 essential car maintenance checks you want to do and the fluids and parts that need to be replaced as required by your car manufacturer:
CCM’s 15-point essential car maintenance checklist:
IMPORTANT: First and foremost, you want to get to know your car intimately. You want to start by reading your car owner’s manual and always respect the car manufacturer’s specifications and recommendations.
Remember: when in doubt or conflicted, always follow the car manufacturer’s guidelines! Safety first!
1. Learn the meaning of the different warning lights

Modern cars have loads of built-in security checks and warning lights. That’s a good place to start when you do your checklist. See if there are any warning lights lit or blinking. You want to get acquainted with all the symbols and understand what the messages on your car’s dashboard mean. You can find them all in your car owner’s manual.
Warning lights and warning messages are there for a reason and should not be ignored. When a warning light starts to blink, you want to take it seriously or you might damage your car and possibly endanger your safety and the safety of your passengers.
However, most warning lights and messages aren’t critical and don’t require you to immediately stop on the side of the road. Often, these warning lights and messages tell you that you need to top up your screen wash fluid or some other fluid. These warnings don’t require an urgent intervention. Don’t panic, but check the problem first thing, when safety allows.
Some warning lights will automatically die when the problem is gone, like when you top off the fluid level that was low. Other critical warning lights will have to be reset by your dealership.
2. Check your brakes
When you ask most people what they consider to be the most crucial part of their car, they will most likely answer that they think it is the engine. Well, they should think twice, because first of all, you want your brakes to work when they should. If they don’t, it can have catastrophic consequences. If you ask experienced racing drivers or a car expert, they will unanimously answer that brakes come first.
There are several things you can do yourself to maintain your car’s braking system in optimal working condition:
☐ Check your brake fluid level

It’s good practice to check your brake fluid level at least every year and before you go on holiday with your car or drive long distances.
A minimal drop in fluid level caused by brake pad wear is normal and the fluid should just be topped off. You want to check your car owner’s manual for instructions and the right kind of brake fluid to use.
However, if the fluid level has dropped considerably, top it up and consult a professional as soon as possible. This might indicate that there is a leak in the braking system that can result in loss of braking capability. This can lead to life-threatening situations for you, your passengers and other people on the road.
☐ Check brake pedal firmness
With your engine running and your gearbox in neutral, you can check your braking system by stepping on the brake pedal. Pump it a few times as hard as you can. Your brake pedal should only travel about halfway and you should not be able to push it all the way to the floor. When you push it to the limit, it should feel rock solid, not spongy.
If you can push your brake pedal to the floor and/or it feels like you’re squeezing a sponge instead of feeling solid, your brakes need to be checked by a professional without delay. It is not safe to drive your car with spongy brakes or with a brake pedal that can be pushed all the way to the floor.
☐ Check brake pads and rotors visually
Most modern cars are equipped with either disc brakes all around or disc brakes on the front wheels and drum brakes on the rear wheels. Most classic cars have drum brakes on four wheels. It’s very easy to see which is which: Disc brakes have an open construction with the brake rotor (also called the disc) and the brake caliper visible (picture 1). Drum brakes on the other hand, are fully enclosed (picture 2).

Drum brakes cannot be inspected visually without taking them apart, but disc brakes can.
You can check the two major disc brake components for wear: the rotor itself, which is the large, round, shiny metal disc (hence the word disc brake) and the brake pads:
- The rotor should be worn evenly without excessive grooving in the disc surface, with only the inner and outer edge of the disc raised compared to the rest of the surface. There should be no visible cracks in the disc surface and the disc color should be even, without darker areas. Dark areas mean that the rotor has overheated and deformed and needs to be replaced.

A cracked, deformed or damaged rotor will cause low-frequency vibrations, known as “judder” while braking. If a rotor fails, it can cause a complete wheel lock-up, causing the driver to lose control of the vehicle.If you notice any of these signs during your inspection, you should see a professional mechanic right away and have the rotors and brake pads replaced. Disc brake rotors should always be replaced in pairs, front or rear. The brake pads need to be replaced too when you replace the rotors, by the way.
- The brake pads should have enough friction material on them (see picture below). A new pad has about 8-12mm friction material. The bare minimum is about 3 mm (⅛ inch or two stacked quarters) of friction material. Any less than that and you’ll need to have your brake pads replaced immediately to avoid brake failure.


3. Check tire tread depth and wear pattern, age and condition
It’s equally important to check the health of your car tires, because car tires age and wear. Aged and/or worn tires are a safety hazard and should be replaced without ado.
☐ Tire age
All car tires over ten years old, including spare tires, should be replaced with new tires, regardless of tread depth. The reason is that tire rubber ages and loses flexibility. Old tires can crack and sometimes even explode, possibly with dramatic consequences.
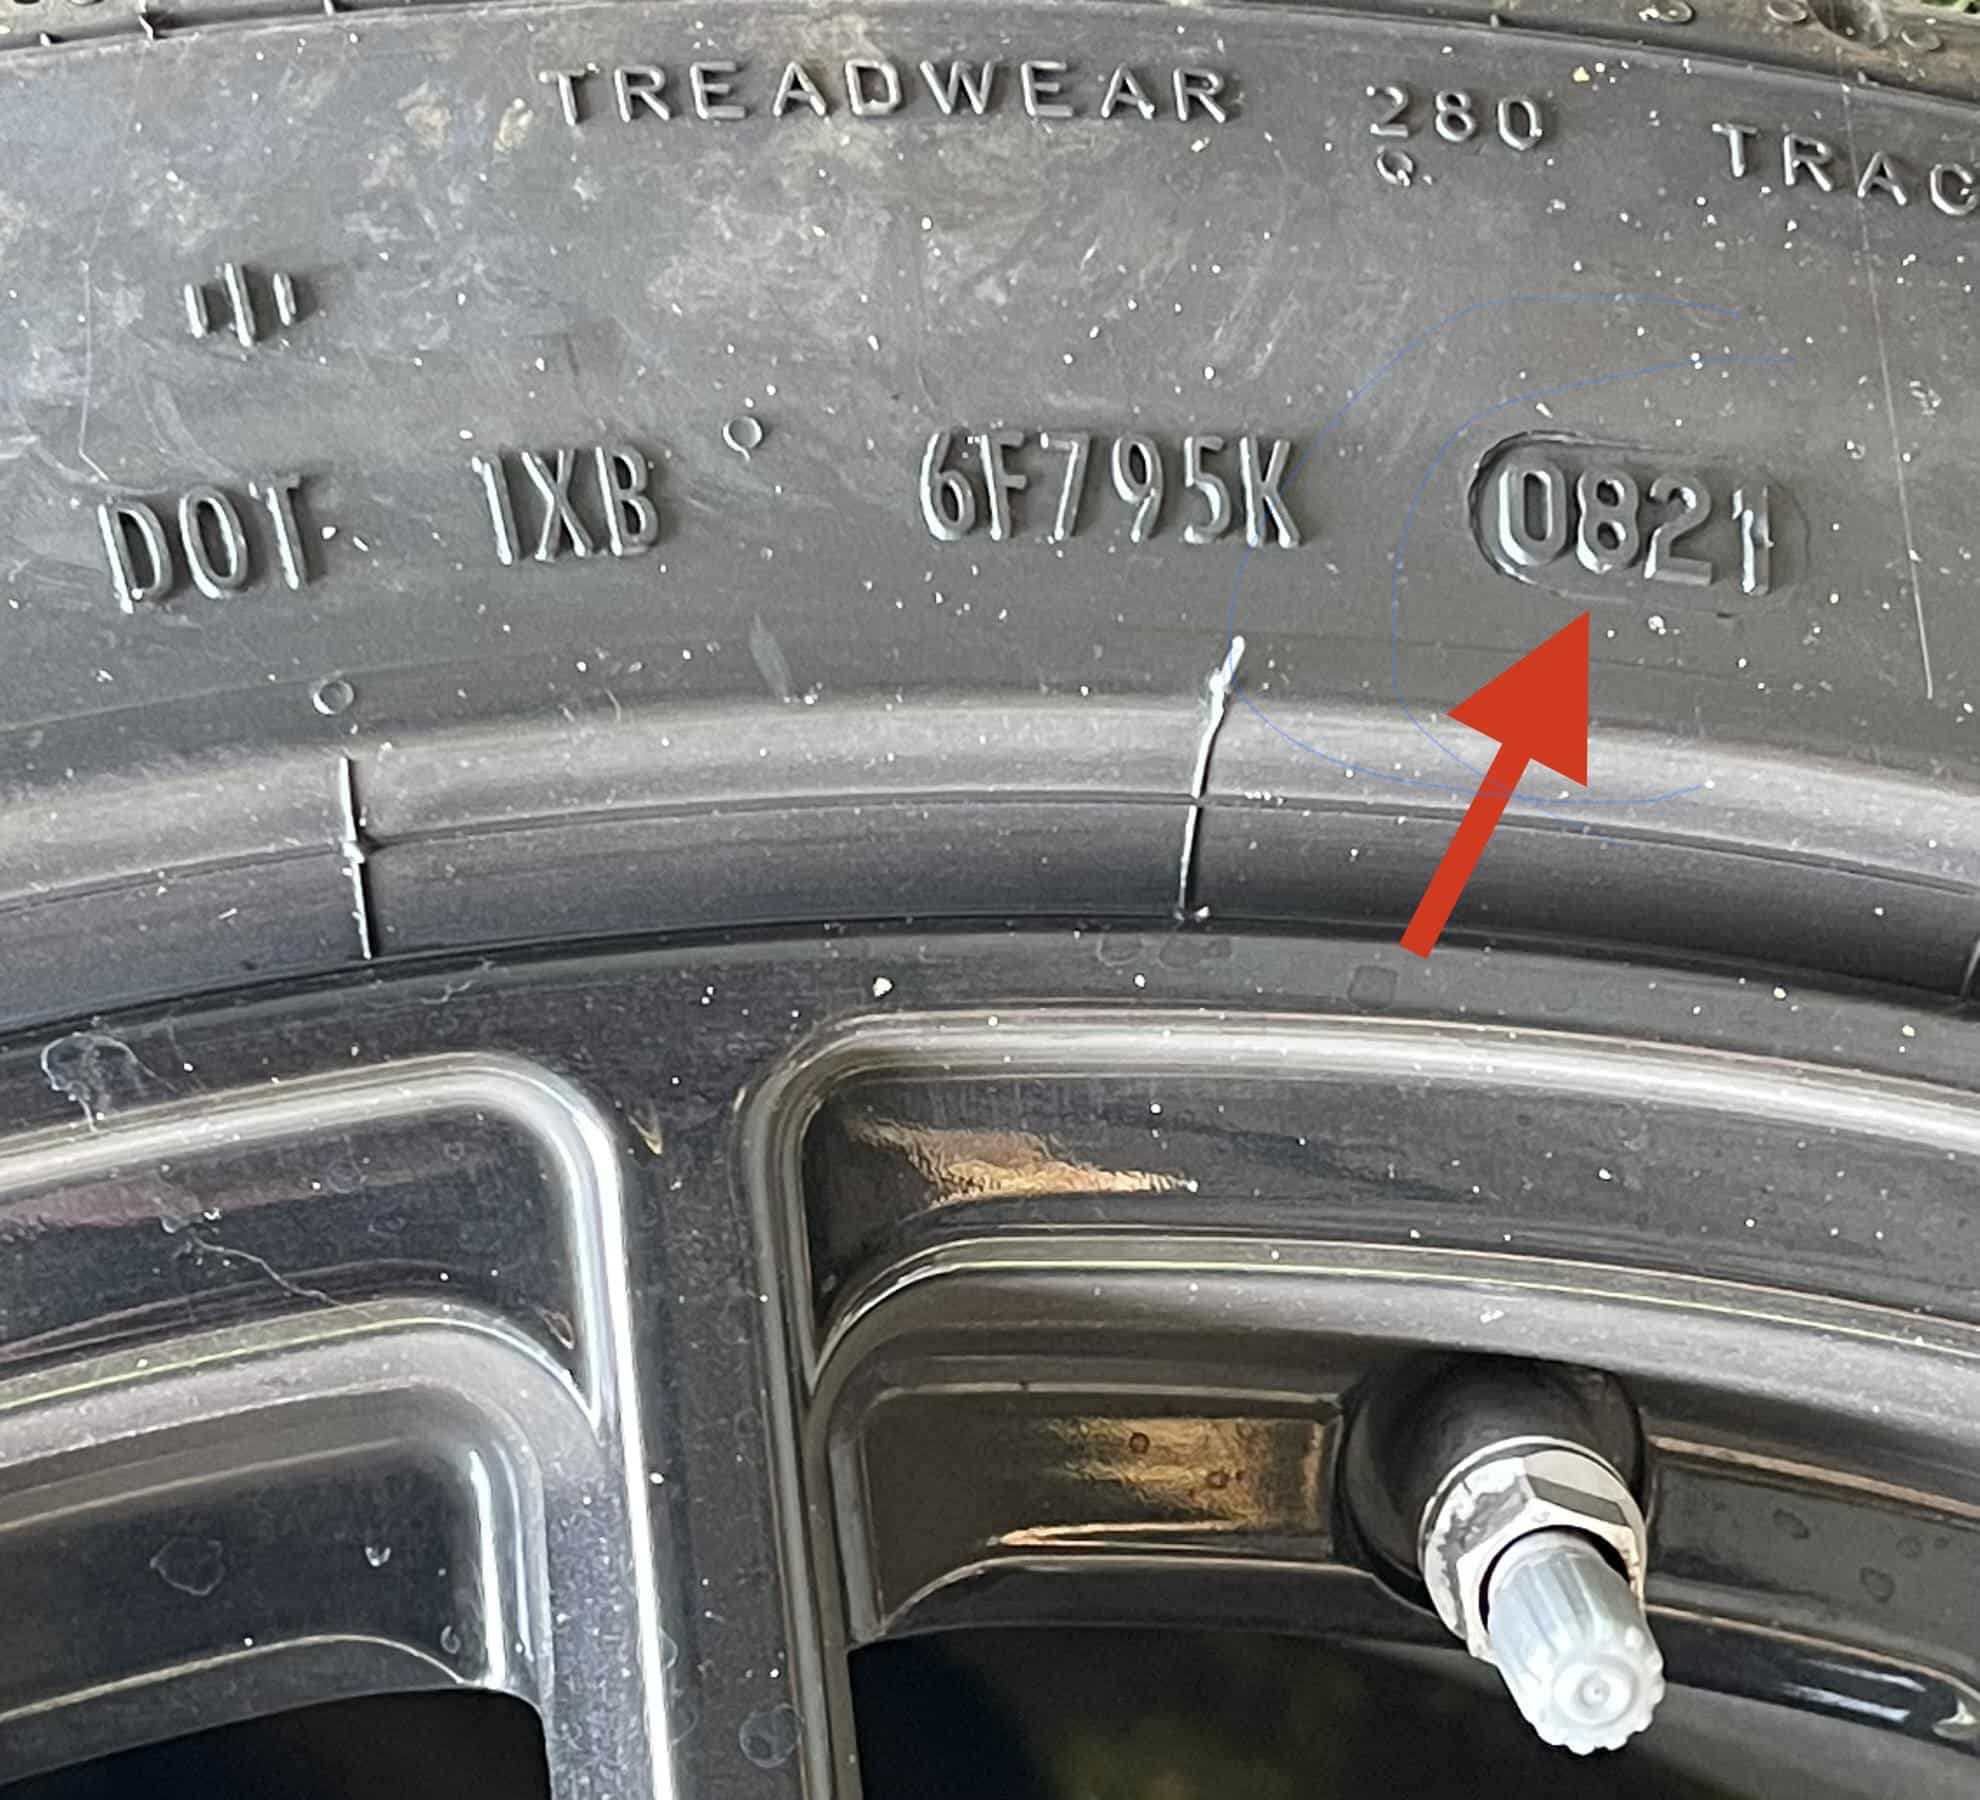
You can simply check the age of your car tires by examining the markings on the tire sidewall following the “DOT” symbol. The last four numbers denote the fabrication date of the tire. The first two numbers are the week of production, the last two the year of production.
E.g: the tire in the picture was manufactured in the 8th week of 2021.
☐ Tire tread depth

The easy way to check tire tread depth is to turn a penny so that Lincoln’s head points down into the tread. If the top of his head disappears between the ribs, your tread is still above 2/32”, which is the U.S. Department of Transportation’s recommended limit for tire replacement. If you can see his entire head, your tread is no longer deep enough and it’s time to replace your tire(s).
☐ Tire tread wear pattern
Car tires should wear evenly. If they don’t, you should take action immediately:
- If either side of the tire tread is worn more than the rest of the tire and the wear is asymmetrical, you should have your wheel alignment checked.
- If the inside of your tire is worn more than the outside edges, you should check your tire pressure. Most likely, there is (or was at one point) too much tire pressure. This makes the tire bulge in the middle of the thread, speeding wear in the middle part of the tire.
- If both outside edges of the tire are worn equally but the inside of the tire tread has much more tread depth, you want to check your tire pressure too. This was very likely caused by driving with too little tire pressure (at one point in time), which makes the outer edges of your tire wear much faster than the middle part.
☐ Tire condition
Besides tread and age, you want to also closely monitor your car tires’ condition. If a tire has cuts or signs of cracking, it should be replaced immediately. Use common sense and don’t take risks with your safety or the safety of your passengers. When in doubt, consult a tire specialist.

4. Check tire pressure
Probably the most underrated maintenance check is your car’s tire pressure. Kick ‘em, and if there’s air in them you’re good, right? Nope, not at all!
Your car’s tire pressure has to be exactly right, because there’s a lot riding on it (pun intended). If your tire pressure is off, this will have a negative impact on:
- Fuel consumption
- Handling
- Stability/suspension
- Emergency braking distance
- Tire tread wear (uneven)
- Tire life
- Driving comfort
Check your car owner’s manual for the right tire pressure for your type of tires. You want to increase your tire pressure like instructed in your car owner’s manual when you carry heavy loads like when you’re on holiday with 5 adults and their luggage or when you’re hauling firewood in your pickup truck.
Don’t forget to reset your tires back to standard pressure when things are back to normal, because too much tire pressure is just as bad as too little.
You want to check your tire pressure at least once a month, and re-inflate your tires if necessary because all tires, even brand new ones, lose about 1-3 psi of air pressure per month. This is mainly because of osmosis or permeation, the ability of air to pass through the structure of the tire rubber.
If you don’t have an air compressor to inflate your tires, we can highly recommend the FORTEM Digital Tire Inflator. Works like a charm if you want to check, increase or decrease tire pressure at your convenience. You can use this little device to check and adjust your tire pressure if needed and it needs no batteries or recharging. It’s always ready to use.
It’s as easy as it gets:
- Start your engine
- Plug the power cord in your cigarette lighter socket
- Connect the pressure hose to your tire’s valve stem
- Check your tire pressure on the display
- Set desired tire pressure by pushing the “+” or “-” push buttons
- Flip the switch to “on” and the tire inflator pumps or releases air
- When the correct PSI is reached it turns off automatically
That’s all there’s to it, anyone can do it!
You can take this tire inflator anywhere, keep it in your garage or car boot and you won’t have to go to the service station or dealership to inflate your tires anymore. Depending on where you live, that can save a few bucks too, because sometimes there’s a charge for air pressure service.
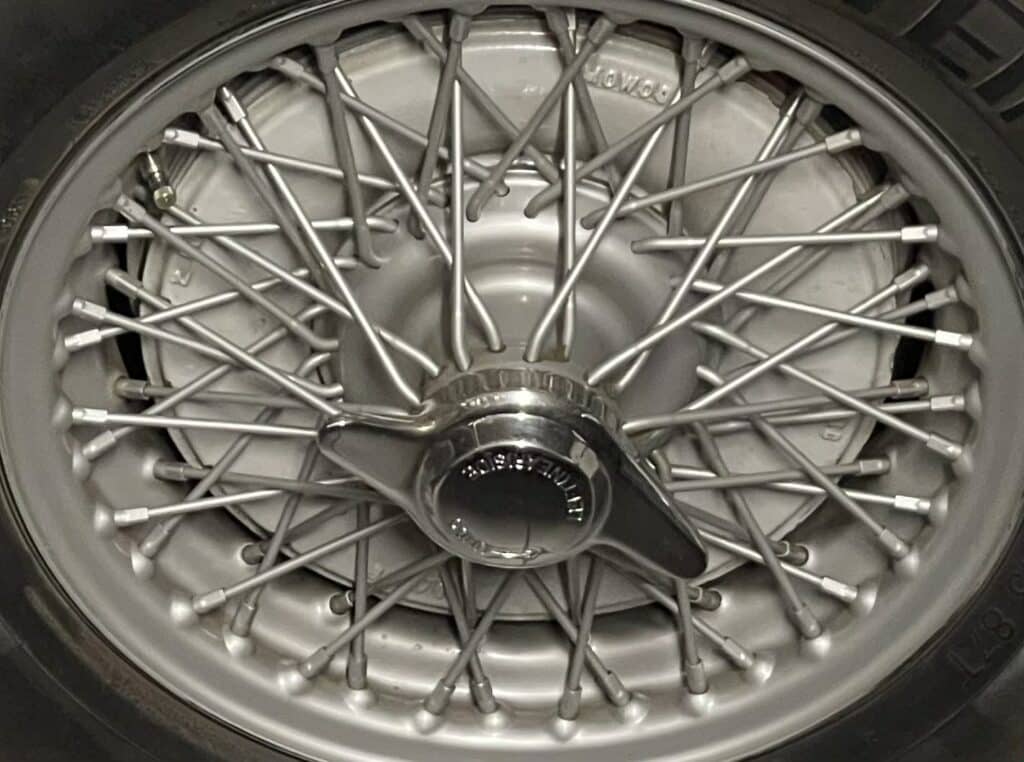
5. Check your wheels
While you’re checking your tires and tire pressure, you might as well check your wheels too.
☐ Check for dents and deformations
Deformed wheels can cause a rhythmic thumping noise, bad road handling and premature suspension wear.
A small dent in your wheel rim may only matter aesthetically, while a larger wheel deformity can cause vibrations that in turn will cause premature suspension wear and extra bills if you don’t tackle it. Often a wheel can be repaired but if the deformation is considerable, it’s best to replace it.
Wheels can get deformed when you hit a sharp pothole or a sharp curb. Damage on the outside of the wheel is the easiest to detect: slide your finger over the rim to feel for roughness or deformation. Eyeball the wheel for abnormalities or cracks.
If you have a car jack, jack the wheel off the ground and spin it while holding a pencil point next to the rim as a reference point. The wheel rim should remain stable when rotating and not wobble. If it does, have it checked by a professional.
The inside rim of a wheel is much harder to inspect when you don’t have access to a car lift or an inspection pit, but the technique is just the same: from underneath your car, check the inside rim with your finger, eyeball the wheel for abnormalities or cracks and if you have a jack, spin it while holding a pencil next to the inside rim as a reference point.
Another option is of course to take your wheels off to inspect both sides at once.
☐ Check for missing wheel weights

While you’re at it, you also want to check if all wheel weights are still in place. Wheel weights are there to balance your wheel. When a wheel is not balanced, you will feel a shudder in your steering wheel (front wheel imbalance) or a vibration in the floor or in your car seat (rear wheel imbalance).
When wheel weights fall off, they leave a dirty glue spot or a dirt contours as a tell-tale sign (if you haven’t washed them off yet). If one or several weights seem to be missing, have the wheel balanced again.
☐ Check your front wheel bearings
Worn front wheel bearings can cause wheel play, whining noises and overheating. Worst case, a wheel bearing can lock up and cause the driver to lose control over the vehicle.
Worn wheel bearings however, are easy to detect. If you don’t have a car jack, push and pull the top end of the front car tire away and towards you repeatedly while you closely watch the (tire)wheel. Vertically, there should be zero play in the wheel position, no matter how hard you try. Only the tires will flex to and fro, which is normal.
If you have access to a car jack, lift the wheel off the ground and let it spin freely. It should make no noise at all (except some dragging of the brakes sometimes) and keep spinning for a while without much friction.
If you have access to an IR thermometer, you can measure both front wheel centers right after a long drive. The reading should be similar. If there’s a big difference between the two or one is piping hot, the hot bearing is on its way out and should be replaced immediately.
6. Check your car’s suspension
Your suspension is crucial to keep you safely on the road. If your shocks are worn out, your wheels will bounce, lose grip and your car will become uncontrollable. Luckily, there’s a simple test you can do yourself to see if your suspension is in good shape or not. It’s called the “bounce test”:
Simply push down with your entire weight on your car’s four corners, one at a time. When you’ve pushed as hard as you can, immediately release pressure and count the number of times the car bounces. If it bounces more than three times, your shock absorbers need to be replaced. If one is bad, you want to replace them all at once.
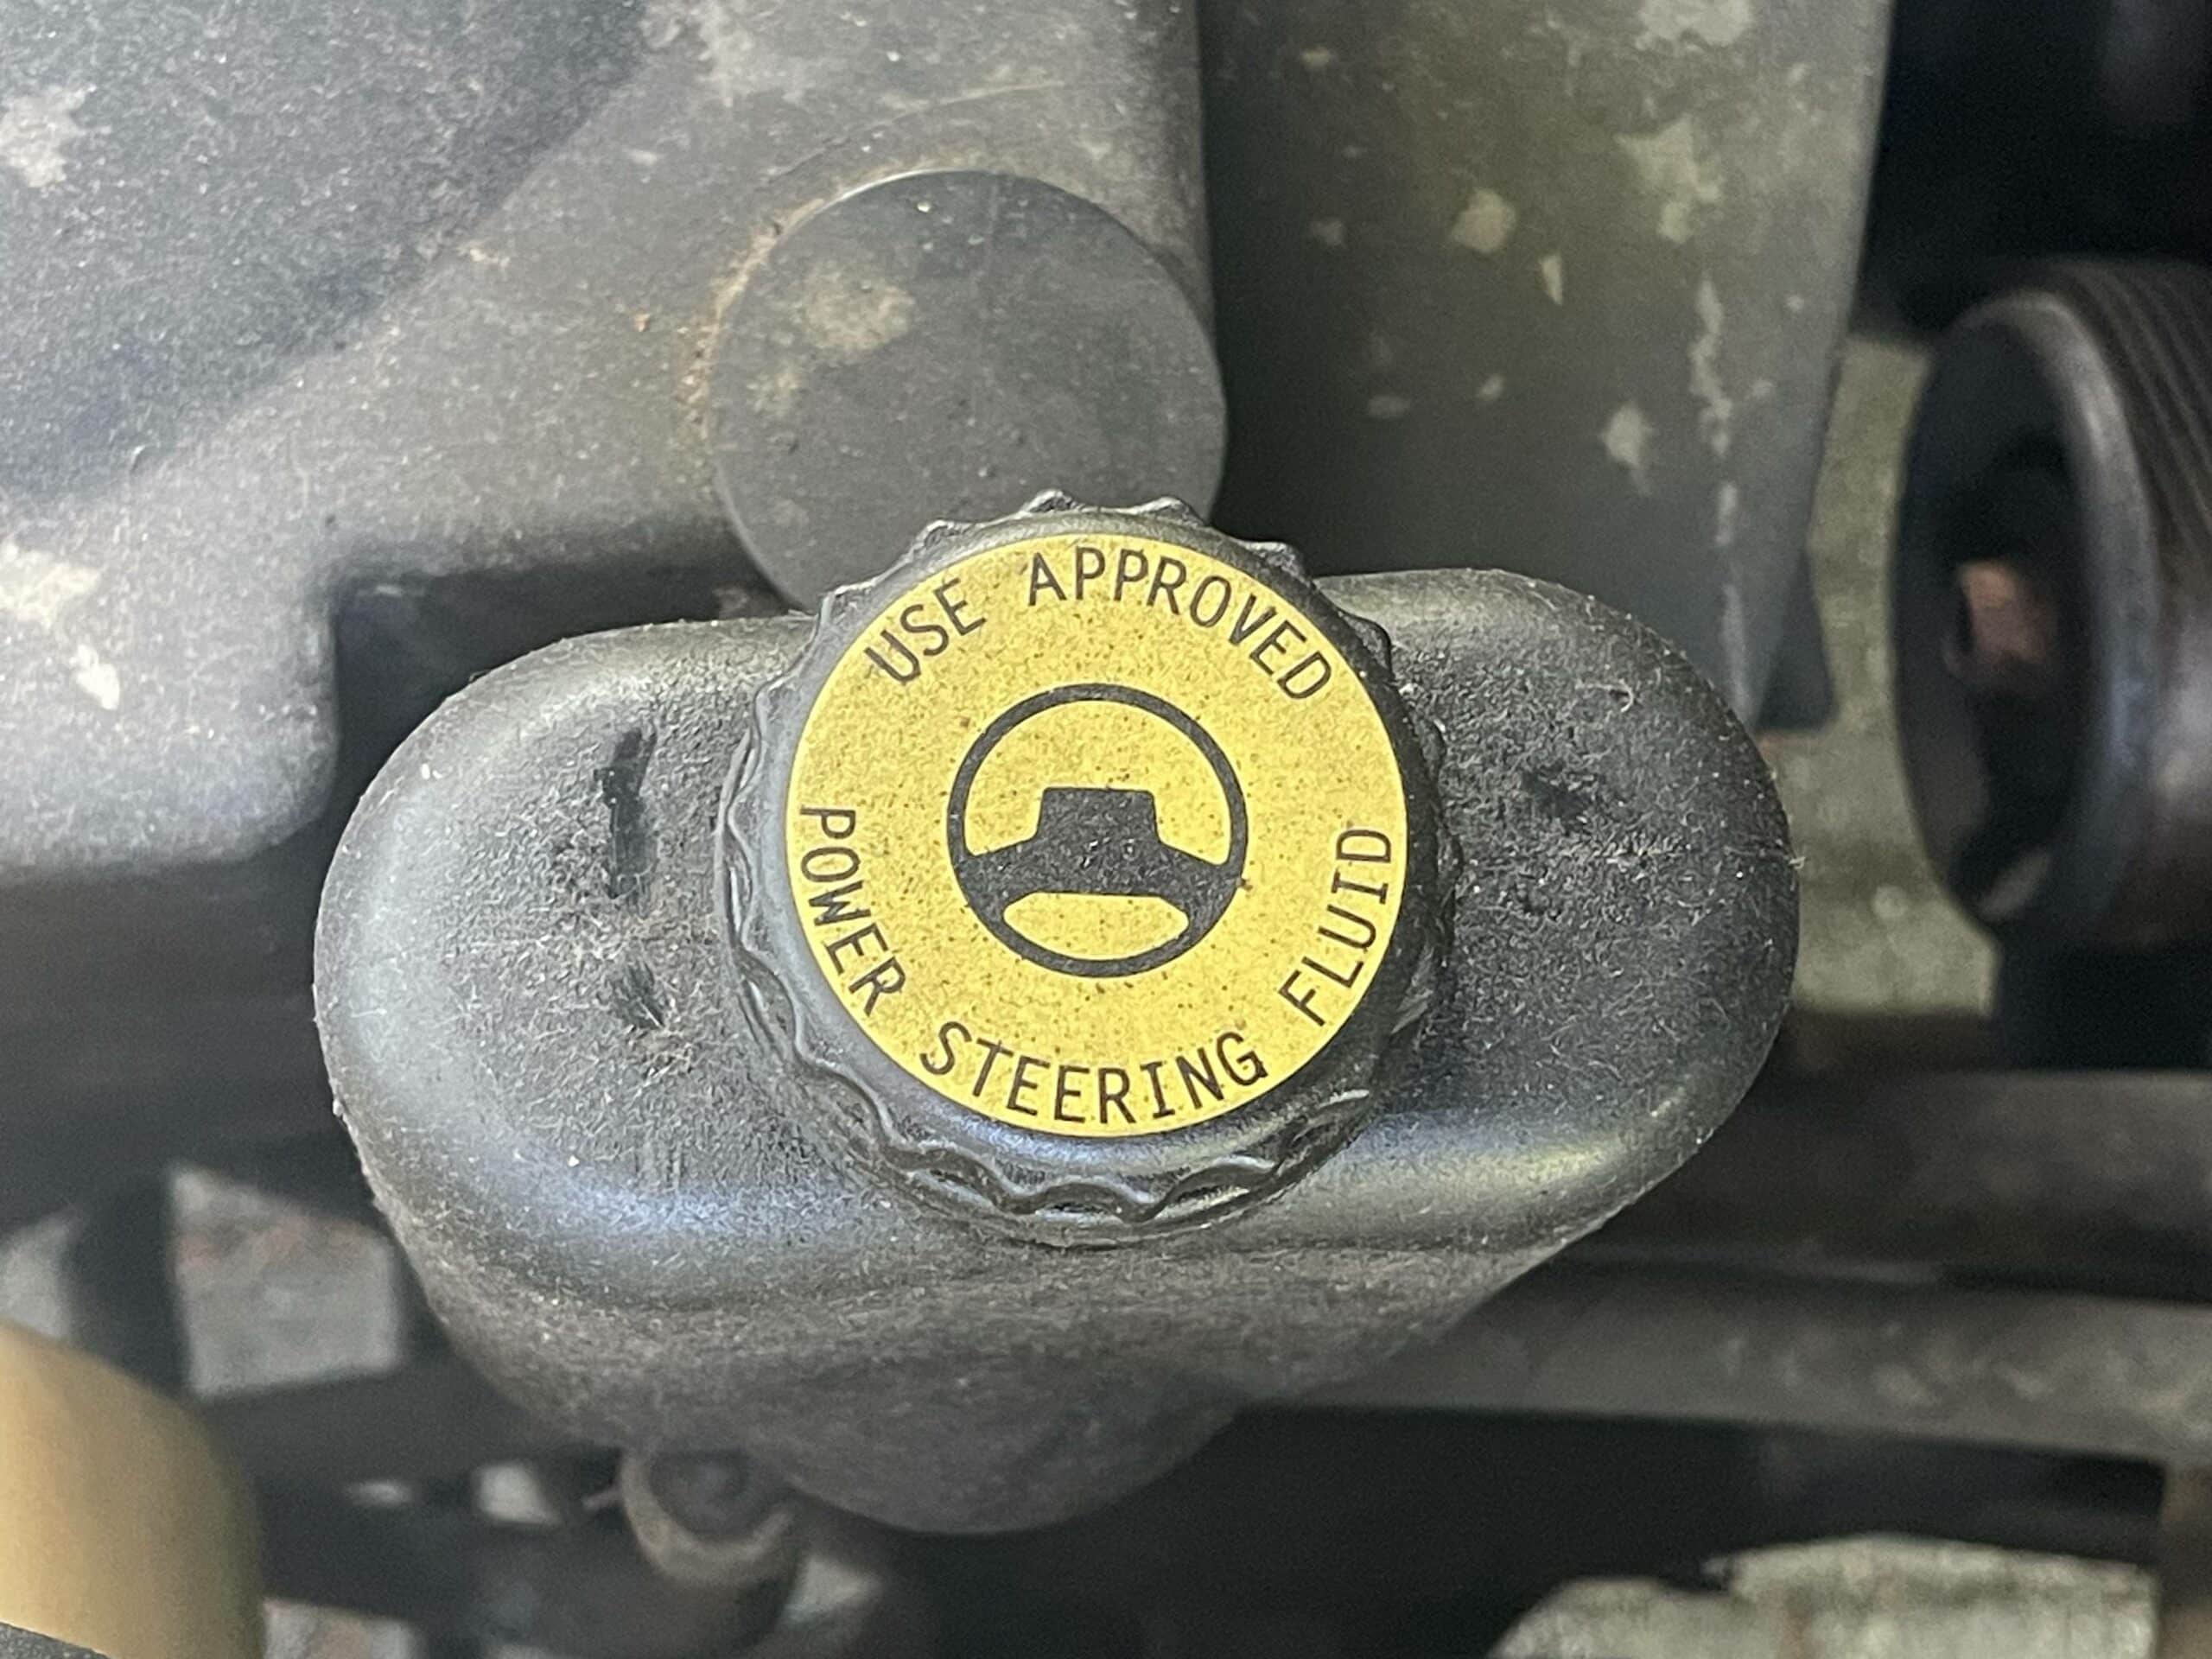
7. Check your (power-) steering system
Only classic cars and the odd modern car like the Alfa Romeo 4C have non-assisted steering. For American made cars, power steering has become the norm since the late 60’s. That’s why it is most likely that your car has power steering too.
Your power steering can be hydraulic, electric (EPAS / Electric Power Assisted Steering), electro-hydraulic (hybrid) or drive-by-wire, depending.
Consult your car owner’s manual or a service manual to know which type of power steering system your car has.
EPAS and drive-by-wire power steering systems are fully electric and need no fluid changes. That’s why you won’t find a power steering fluid reservoir in cars with this type of power steering. These PS-systems are basically maintenance-free and are considered very reliable.
You want to contact your dealership if they stop working because specialized software and diagnostic equipment will be needed.
However, most cars on the US roads today still have hydraulic power steering. This type of power steering works with hydraulic pressure generated by a belt-driven power steering pump (see picture) that supplies pressure to the steering mechanism. This enables the steering mechanism to react to the slightest movement of the steering wheel, making the steering much lighter.

To check if your power steering system is still working as it should, you can do a couple of simple tests:
For all types of PS except Drive-By-Wire
☐ Check steering linkage play (for all types of PS except Drive-By-Wire)
Over time, mechanical components that link your steering wheel to your front wheels will wear. Check steering linkage play by moving your steering wheel from side to side with your motor running. Your front wheels should start to turn instantly when you turn your steering wheel more than 1/2in (13mm). If your wheels only start to turn after a couple of inches, there’s too much play and you should have a professional look at it.
For hydraulic power steering system
To check if your hydraulic power steering system is still working as it should, you can do a couple of simple tests:
☐ Check hydraulic power steering system fluid level
You want to check your power fluid reservoir level a couple of times a year. If the level is low, add fluid until it is back to normal.

The PS reservoir’s location depends on your vehicle brand and model. Consult your car owner’s manual for its location, fluid level indication and which fluid to use.
☐ Check hydraulic power steering system leakage
With the engine turned off, inspect your PS system for leaks. Large leaks can easily be detected by looking under your car for drips or puddles of red to dark red/black fluid.
Small leaks can be less obvious though. You want to follow the hydraulic lines and connections starting from the PS reservoir to the PS pump and the PS box and possible other components connected to the hydraulic circuit, like a PS cooler etc…
You want to feel for fluid under the lowest point of every component, connector, pipe and hose. If a component is wet or there’s a drip of red fluid underneath, the connection should be tightened or the hose, pipe or component should be replaced. Sometimes replacing a worn o-ring in a connector can be enough to solve the problem.
When you have a power steering leak, you will have to top up your PS reservoir frequently. A PS leak can also cause air to get into the system, which can cause the PS pump to make excessive noise and to not perform as it should.
Have a professional look at it if you’re not comfortable with hydraulics and power steering systems.
☐ Check hydraulic power steering system fluid color
Fresh power steering fluid is translucent red. If your PS fluid is very murky and dark, it should be replaced for optimal steering performance and to avoid premature power steering pump wear.
On average, PS fluid should be changed every 40,000 to 80,000 miles or when it turns dark and murky.
Consult your car owner’s manual or a service manual for exact instructions and which fluid to use.
☐ Check hydraulic power steering system noise
There should be no whining or whirring noise coming from your power steering pump that varies in pitch based on your engine speed and how you attempt to steer your vehicle. Whining or whirring noise points to air in the system or a worn power steering pump.
Bleeding the PS system will often solve the problem. If the sound doesn’t go away after you’ve bled the PS system several times, the power steering pump is worn and should be replaced. Consult a mechanic if you’re not familiar with the matter.
8. Check your car battery

Most people only think of their car battery when their car won’t start. However, your car battery does much more than just start your engine. It powers a growing number of electric and electronic components and accessories like your car’s lighting, automatic windows, sunroof mechanism, door locking mechanism, car alarm, satellite tracking, audio equipment, GPS, multimedia and onboard diagnostics, electric/heated seats and steering wheel, rear window defrost system, electronic ignition, start-stop system, fuel pump, electric engine cooling fan(s), air conditioning, phone charger(s),…
This makes your car battery arguably the most versatile component of your car. Without it, you’re stranded. That’s why it’s so crucial to regularly check your car battery’s health and charging status before this powerhouse gets you in trouble.
In order to keep your car’s electrics powered, you want to check several things:
☐ Check battery age
It’s wise to write the date of purchase on your car battery. Car batteries age internally because of continuously ongoing chemical processes. From the moment a car battery is produced in the factory, it starts to age and degrade. Depending on its quality, use and maintenance, a car battery only lasts about 5 years on average.
That’s why you want to change your battery every 5 years if you require maximum reliability.
☐ Check battery terminals
Check your battery terminals for corrosion. If they are corroded, clean them with sand paper or a wire brush and smear them with silicone grease or petroleum jelly. They form a very effective barrier against corrosion.
You want to make sure they are tightened firmly for optimal electrical conductivity.
☐ Check battery voltage

Check your car battery voltage with a multimeter. With the car engine not running and all electrics turned off, it should read 12.6V DC or higher. If it reads below 12.6V when you’ve just driven your car for more than 20 minutes or when you’ve just charged it, your battery should be replaced.
☐ Check battery voltage drop at engine startup
You can perform a voltage test under load with your battery connected to your car battery using a multimeter. This will give general indication of the battery’s power and the state it’s in.
With all electric accessories turned off and your multimeter contacting the battery terminals, keep a close eye on the meter’s display when you start your car. When the starter motor turns over, the battery voltage will drop for a split second until your engine kicks in, which is normal.
However, if the voltage drops below 10V while cranking, your battery should be replaced because it is too weak.
☐ Check alternator charging voltage
You want to make sure your alternator charges your battery properly. You can test the voltage at the battery terminals with the engine running at idle. First check that your battery is fully charged with the engine off (12.6V or higher) before performing this test.
With the engine running, voltage should be within the 13.7 to 14.8 volts range, if the alternator is working as it should.
If the battery voltage is below 13.6 volts, the alternator is charging insufficiently, which is bad for your battery life and performance.
Even worse is a voltage above 15V, which leads to overcharging. This is most likely because the voltage regulator isn’t working properly. The battery will boil dry and might explode. Chances are that even your electrical system will get fried. This should be addressed without delay to prevent further electrical damage.
For more in-depth information on these subjects, check out our related posts:
- How To Charge A Car Battery
- How To Disconnect A Car Battery
- How To Test A Car Battery With A Multimeter
- How To Jump Start A Car
- Best Car Batteries
- Best Car Battery Chargers
- Best Car Battery Testers
- Best Automotive Multimeters
- Best Portable Jump Starters
9. Check your drive belt(s)

A drive belt or fan belt, distributes power to many important components located at the front of the engine. It powers the cooling fan, the alternator, the water pump, the power steering pump and the AC compressor. All these components have a pulley where the drive belt wraps around. As the engine turns, it spins the drive belt which in turn spins the pulleys of all the connected accessories.
Modern Poly-V belts as well as the older type V-belts are made of high-quality reinforced rubber (EPDM) and have a service life of between 50,000 and 100,000 miles.
However, in extreme weather conditions or under heavy load they can start to deteriorate much sooner. Slipping or squeaking are often tell-tale signs that the belt needs replacing.
In case you have an older car, it might still have an old-school manual belt tensioning system. With this type of tensioner, the problem may not be that the belt is worn, but that it is simply too loose. With the engine turned off, you can try to tighten the belt to solve the slipping or noisy belt. If tightening works, and the belt shows no visual signs of deterioration, you don’t have to replace the drive belt yet. If this doesn’t solve the problem, you want to replace it anyway.
If your car has an automatic belt tensioning system, belt tension can’t be adjusted and the belt will have to be replaced.
Regularly check your drive belt for cracks or other signs of aging. You want to replace a suspect belt immediately to prevent a roadside breakdown.
10. Check your car’s fluid levels
☐ Check engine coolant level
Engine coolant, typically a 50-50 mix of antifreeze and water is essential to keep your engine cool. The antifreeze prevents the water component in the cooling mixture from freezing (hence the name), and raises the boiling point. It also acts as a rust inhibitor. Because too little coolant can lead to overheating, you want to keep a close eye on your car’s coolant level.
You can check your coolant level by looking at the overflow tank level (see picture below) with a cold engine. Add coolant when needed. Check your car owner’s manual for instructions and for the right type of coolant.

Almost every modern car has a sensor that will warn you in case your cooling fluid is low, but it’s smart to be ahead of the game and to not wait until the cooling fluid level is low and you need to top it up at the most inconvenient of times (wanna bet?).
You would have to wait at least half an hour for your engine to cool down and safely add coolant. Chances are that the nearest service station where they sell coolant is miles away too… You don’t want to be in that situation…
Remember, you should take a coolant level warning light or an overheating warning very seriously when it comes on and shut off your engine as soon as it is safe to do so to prevent costly engine repairs.
Your engine’s coolant should be replaced every few years because the antifreeze loses effectiveness over time which will cause internal engine components to rust. Aging coolant is also increasingly less effective against freezing or overheating.
Follow your car owner manual’s guidelines concerning the type of coolant to use and how often to change it.
Often, old or classic cars don’t have an overflow tank. In that case, you’ll have to check the radiator fluid level by opening the radiator cap with the engine not running and cold. The coolant should be visible with the cap removed, and about an inch under the filler neck, depending on the car brand and model.

CAUTION: You want to check your coolant level with a cold engine or with a warm engine that has been turned off and cooled down for at least 30 minutes, because an operating or hot cooling circuit is under pressure at a temperature of around 220°F. Opening a hot, pressurized cooling system can cause serious injury!
☐ Check transmission fluid level

Your car’s transmission fluid lubricates and cools your gearbox. Without ample transmission fluid, your transmission will malfunction and overheat with hefty repair bills as a result.
It’s important to keep the transmission fluid level near the ‘full’ or “max” marker but to not overfill it. To measure the fluid level, take out the transmission dipstick which is usually further back in the engine bay, toward the firewall (the bulkhead at the front of the cabin). The transmission dipstick is typically marked with a specific color or a transmission symbol.
Make sure you are pulling the transmission dipstick and not the engine-oil dipstick. The fluid on the transmission dipstick is translucent red to dark red, while the engine oil dipstick is honey-brown-black-ish, depending on its freshness. If you’re not sure which is which, check your car owner’s manual.
To add transmission fluid, use a funnel that fits in the transmission dipstick tube and pour just enough transmission fluid down to reach the “full” or “max” line. Allow the fluid to settle before measuring and adding some more. Be very careful not to overfill!
If the transmission fluid on the dipstick is murky, it will need to be refreshed. A transmission fluid change every 30,000 to 60,000 miles or per instructions in the car owner’s manual is crucial for a transmission if you want to keep your vehicle running and shifting smoothly and reliably. It helps to keep the transmission cool and lubricated.
Timely transmission fluid changes can avoid thousands in repair costs caused by premature wear. Check out our step-by-step guide to help you change your automatic or manual transmission fluid easily and effectively.
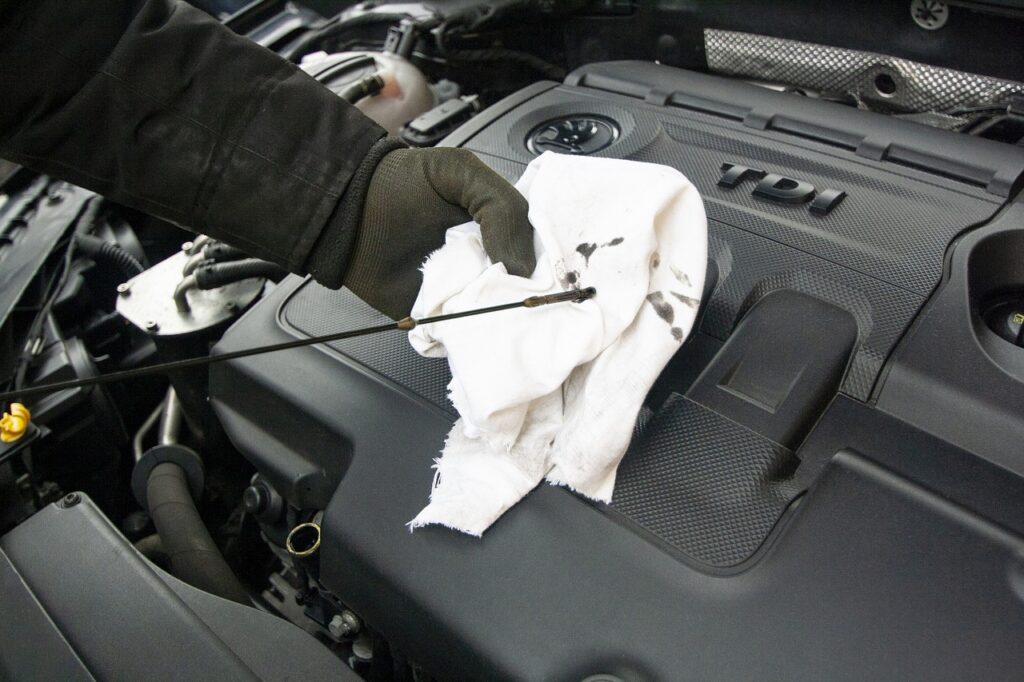
☐ Check engine oil level

Don’t take chances by trusting solely on your engine oil warning sensor. It’s just common sense to check your engine oil level every once in a while to make sure and add some engine oil if needed.
Your engine needs a sufficient volume of engine oil to be able to perform optimally. Oil starvation can cause severe engine wear and can even lead to catastrophic failure due to lack of lubrication and overheating.
You can check the engine oil level by pulling the dipstick when the engine is not running. On most car models, the dipstick is located on the left side of the engine. It usually has a yellow or orange circular handle which makes it clearly visible.

When you pull this handle, a long flexible metal measuring rod will slide out of the engine. Wipe it clear and re-insert it in the tubular holder it came out of. Make sure to push it all the way down and hold it there for a few seconds for the oil to settle on the dipstick. Pull it back out and immediately read the oil level on the dipstick. The reading is where the dry end of the stick meets the oily part. Depending on the brand and type of your car, your dipstick can have different markings like ‘low” and “full” or “add” and “max” or just some creases or lines.

If your engine oil level is close to “full”, “max” or the crease or the line that depicts maximum oil content, you’re good.
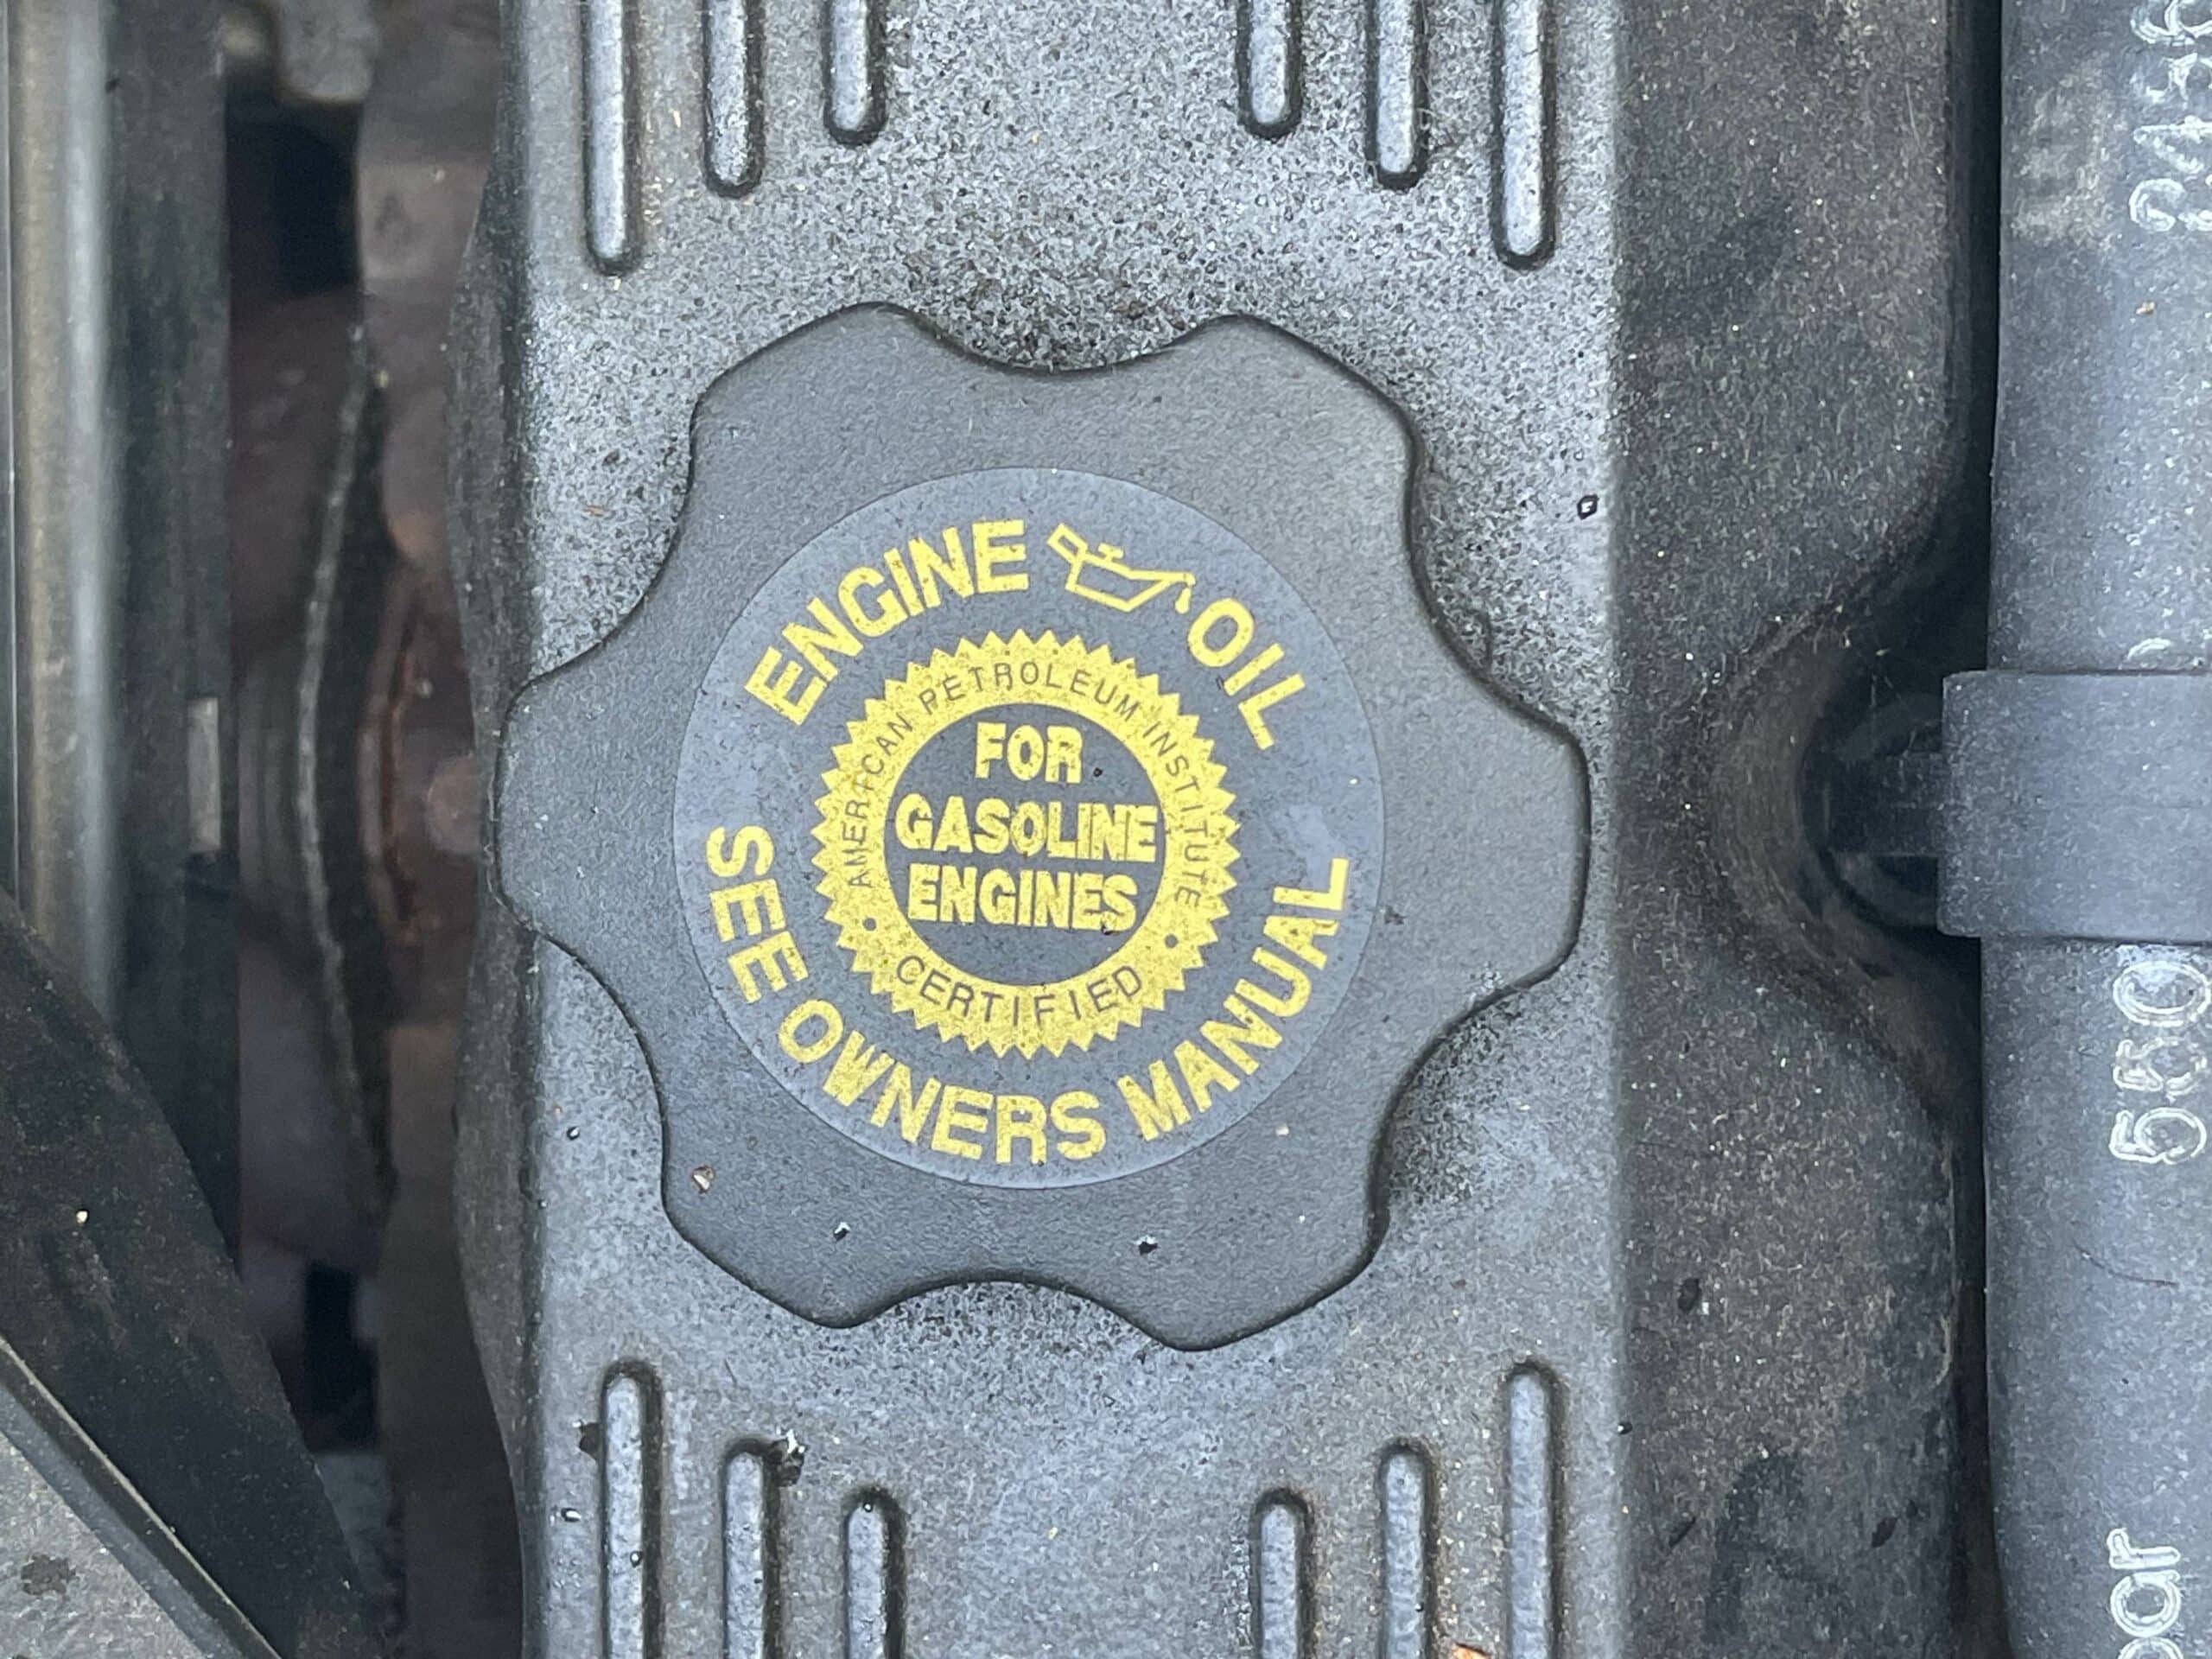
If it is below that marking, you want to add some oil through the plastic screw cap on top of your engine with an oil symbol and/or “engine oil” on it, until it is. Then close the cap.
Take care not to overfill, because too much oil isn’t good either!
NOTE: To not run the risk of overfilling your engine oil, it’s recommended to add engine oil incrementally, adding only small amounts each time. After adding a small amount, you want to wait half a minute before measuring the oil level, so the oil can work its way down to the oil pan. Continue adding small amounts until the oil level is at the desired level.
Check your car owner’s manual or service manual for detailed information for your specific car model and which weight of engine oil to use. For more in-depth information on this subject, check out “How To Change Oil”
☐ Check power steering fluid level
For more details check item #7 “Hydraulic power steering system fluid level check” in this post.
☐ Check differential fluid level
A car differential transmits engine power to the wheels through a set of gears and allows them to turn at different speeds when the car turns.
Because it transfers heavy torque loads from your engine to your wheels, it needs to be partially submerged in an oil bath for lubrication and cooling. That’s why you need to make sure that its oil level is always topped up and the differential fluid is changed per recommendations of the manufacturer.
You can find detailed information on how to check, top up and change differential fluid in “How To Change Differential Fluid” and “Best Differential Fluids”.
☐ Check windshield washer fluid level

In bad weather or when it snows, washer fluid can be the difference between having a clear view on the road and driving safely or driving with blurred vision with potentially dangerous consequences.
Everybody probably knows how to do this, but it is often overlooked:
- Open the cap with the windshield and the two spray jets symbol and/or “washer fluid” written on it.
- Top the reservoir up with washer fluid and you’re done.
11. Check your car’s filters
☐ Check engine air filter

An engine air filter ensures that only clean, filtered air enters your engine so it can perform optimally. When it gets clogged, the engine’s performance will be reduced and fuel consumption will go up. That’s why it’s important to regularly check your car engine’s air filter and replace it as per your vehicle manufacturer’s recommendations. Usually, an engine air filter needs to be replaced every 12,000 to 15,000 miles, or much sooner in heavily polluted or dusty environments.


Anyone can check or replace a car engine air filter, it’s very simple.
Consult your car owner’s manual for the exact air filter location and instructions on how to replace it.
☐ Check engine oil filter

An engine oil filter typically removes all particles larger than 20-30 microns from the engine oil. These particles come from the combustion process and tiny metal shavings from normal engine wear. These contaminants need to be removed from the passing oil because if they constantly recirculate, they will act like sandpaper on all moving parts, dramatically accelerating the aging process of the engine.
On average, an engine oil filter needs to be changed every 5,000-8,000 miles when you change your engine oil, depending on your car brand and model. However, you want to change your oil filter sooner rather than later, especially for heavy duty vehicles and vehicles that only do short distances. For more specifics, consult your car owner’s manual.
Your engine oil filter looks like a metal cylinder the size of a large coffee mug that is screwed into the engine block. You can reach it from the side of the engine or from underneath. It may be hidden underneath the undertray, a plastic cover plate, which may need to be removed to get access to the oil filter. Its location and accessibility varies from car to car. When in doubt, check your car owner’s manual.
Have a quick look at the oil filter to make sure it doesn’t leak and check when it was last replaced. If it is still within the car manufacturer’s specs and there’s no leaks, you’re good.
If it “sweats” oil around its seal but doesn’t need to be replaced yet, tighten it a bit. That should solve the problem.
If it needs replacing, remove it. It’s good practice to always change the engine oil and the engine oil filter together, by the way.
To remove your oil filter, you’ll need an oil filter removal tool. It’s a special wrench, strap, pliers or socket set that allows you to get a firm grip on the oil filter to be able to unscrew it.
Before installing the new oil filter, you want to first check if the rubber ring seal is removed before installing the new oil filter with a new rubber ring seal. Sometimes the rubber ring seal sticks to the engine side instead of the filter. If the old seal isn’t removed before installing the new filter and seal, the oil filter cannot be installed properly and it might leak.
Smear some engine oil on the new rubber seal before installing the oil filter and screw it on hand-tight without using tools.
You can write the replacement date or/and mileage on the oil filter with a sharpie or a paint marker to simplify the next inspection.
☐ Check fuel filter
Your car’s fuel filter has the important job of filtering all dirt and impurities out of your fuel before it reaches the engine. Diesel fuel filters also have a water separator that filters water out of the diesel fuel.
You want to replace your car’s fuel filter every 20,000 to 150,000 miles, depending on the type of fuel filter and your car manufacturer’s recommendations. This is important because a dirty fuel filter will cause your engine to idle rough and perform badly. Eventually, it will stall and refuse to start.
Classic cars used to have transparent in-line fuel filters that can be visually inspected and replaced only when necessary, which is great. However, modern cars that run on gasoline have metal filters and diesel powered cars have cartridge fuel filters and neither of these types can be inspected visually. That means that you have to rely on the replacement intervals set by the car manufacturer and replace them as instructed, regardless.
Although some diesel cartridge fuel filters could theoretically be rinsed with clean diesel and reused, once taken apart their seals must be replaced and those only come with the new cartridge. They got you cornered, haven’t they?
Or you replace the cartridge and seals, or you rinse the old one reusing the old seals that possibly will start to leak. Our advice: don’t bother and just replace it. The safety risk of having a diesel leak or pulling air in the fuel system just isn’t worth it!
Basically, replacing a fuel filter is not a difficult job but you often need special tools to remove the fuel filter that are brand-specific. Check your car owner’s manual to find out which filter and tool to use and where it is located.
Don’t let the little investment in a speciality tool scare you because an average gasoline filter costs less than $10 and a tool to remove it about the same. You’re still making a huge profit doing this simple job yourself compared to paying $70 to $150 bucks at a dealership. Diesel cartridge filters cost about $50 on average, but you’ll pay between $150 and $200 to have it replaced at a dealership.
In our book, that’s well worth the little effort it takes to replace that fuel filter. But, if you’re not confident tackling this job, have it done by a professional. Safety first!
☐ Check cabin air filter
Your car’s cabin air filter removes harmful pollutants like pollen and dust from the air you breathe inside your car. It should be replaced every 15,000 to 30,000 miles or when you notice reduced air flow or unpleasant odors. It is located behind the glovebox or under the hood, close to the windscreen. Consult your car owner’s manual for the exact location.
In case the air filter is located behind the glove box, just open the glove box door and empty it. To remove the glovebox, in most cases you’ll have to unhook the little arm or strap that suspends it when it’s open. Now you should easily be able to see the housing of the cabin air filter. It will have some plastic or metal latches, screws, wing nuts, or other fasteners that hold the faceplate in place. When you undo those, the air filter will come right out.
Remove the old filter very carefully to prevent dust, dirt, and debris falling out. You want to vacuum the filter housing before installing the new one. To reinstall the cabin filter housing and glovebox, simply follow the removal steps in reverse.
On some vehicles, the cabin air filter is located under the hood.
The procedure is just the same, but simpler because you won’t have to remove your glovebox and the filter housing will be easier to access.
12. Check your car’s wiper blades

Another heavily underrated safety item are your windshield wiper blades. They should be replaced every year or sooner if you live in a cold, wet climate because the silicone/rubber strip deteriorates and eventually restricts visibility during rainfall which can lead to dangerous situations.
You want to replace your windshield wipers when they leave water streaks and smears on your windshield when it rains or when the silicone/rubber material starts to crack or comes loose from the metal part of the wiper.
For more information on the subject and our selection of the best windshield wipers on the market, check out our post “Best Windshield Wipers”.
13. Check your spark plugs

Spark plugs produce a spark in an internal combustion engine to ignite the air-fuel mixture in the combustion chamber. Usually, there’s one spark plug per cylinder. Depending on the type of spark plug and the brand and type of your car, the spark plugs should be replaced every 30,000-150,000 miles. Consult your car owner’s manual for the right type of spark plugs and when to replace them.
It’s important to change your spark plugs in due time to avoid start-up trouble, rough idling, sluggish acceleration, declining fuel economy, engine misfiring, and engine knocking. You want to check your spark plugs any time one or several of these symptoms occur.
To assess the health of your spark plugs you can take them out and do a visual inspection. The spark plug is bad and needs to be replaced when:
- the white porcelain top insulation is cracked or discolored
- the center electrode porcelain is cracked
- the ground and/or center electrode is corroded
- the thread, metal body or terminal nut are corroded
How to remove spark plugs differs a lot between car brands and models. Some spark plugs are easy to get to and replace, some are tricky. For detailed information on how to replace the spark plugs on your specific vehicle, consult your car owner’s manual or a service manual.
14. Check your fuel economy

You want to always keep an eye on your fuel economy as an early warning system. Check if it is within normal range by consulting your car owner’s manual.
If fuel consumption is (much) higher than normal, or if your MPG suddenly drops for no obvious reason, you want to investigate what technical issue causes this. The most common causes are clogged or damaged fuel injectors or a fouled carburetor, incorrect tire pressure, dirty or worn spark plugs, a bad oxygen sensor or a clogged air filter.
Run this checklist to exclude the things you can check yourself. If this brings no solution, ask a certified mechanic for advice.
15. Check your car exterior
☐ Check car lights
Check your car’s high beam, low beam, indicators, taillights, stop lights and backup light(s).
If one or several lights need replacing, check your car owner’s manual on how to replace them and which type of bulb to use. Some bulbs are cheap and easy to replace, others will be more involved and harder to come by and will have to be replaced at an authorized garage or dealership.
☐ Check car trim
Once in a while, you want to check your car’s exterior trim like logos, chrome or black plastic accents, bumpers, mirrors, a winch,… They can come loose because of vibrations or mishaps at the parking lot.
Tighten, glue or replace them if necessary.
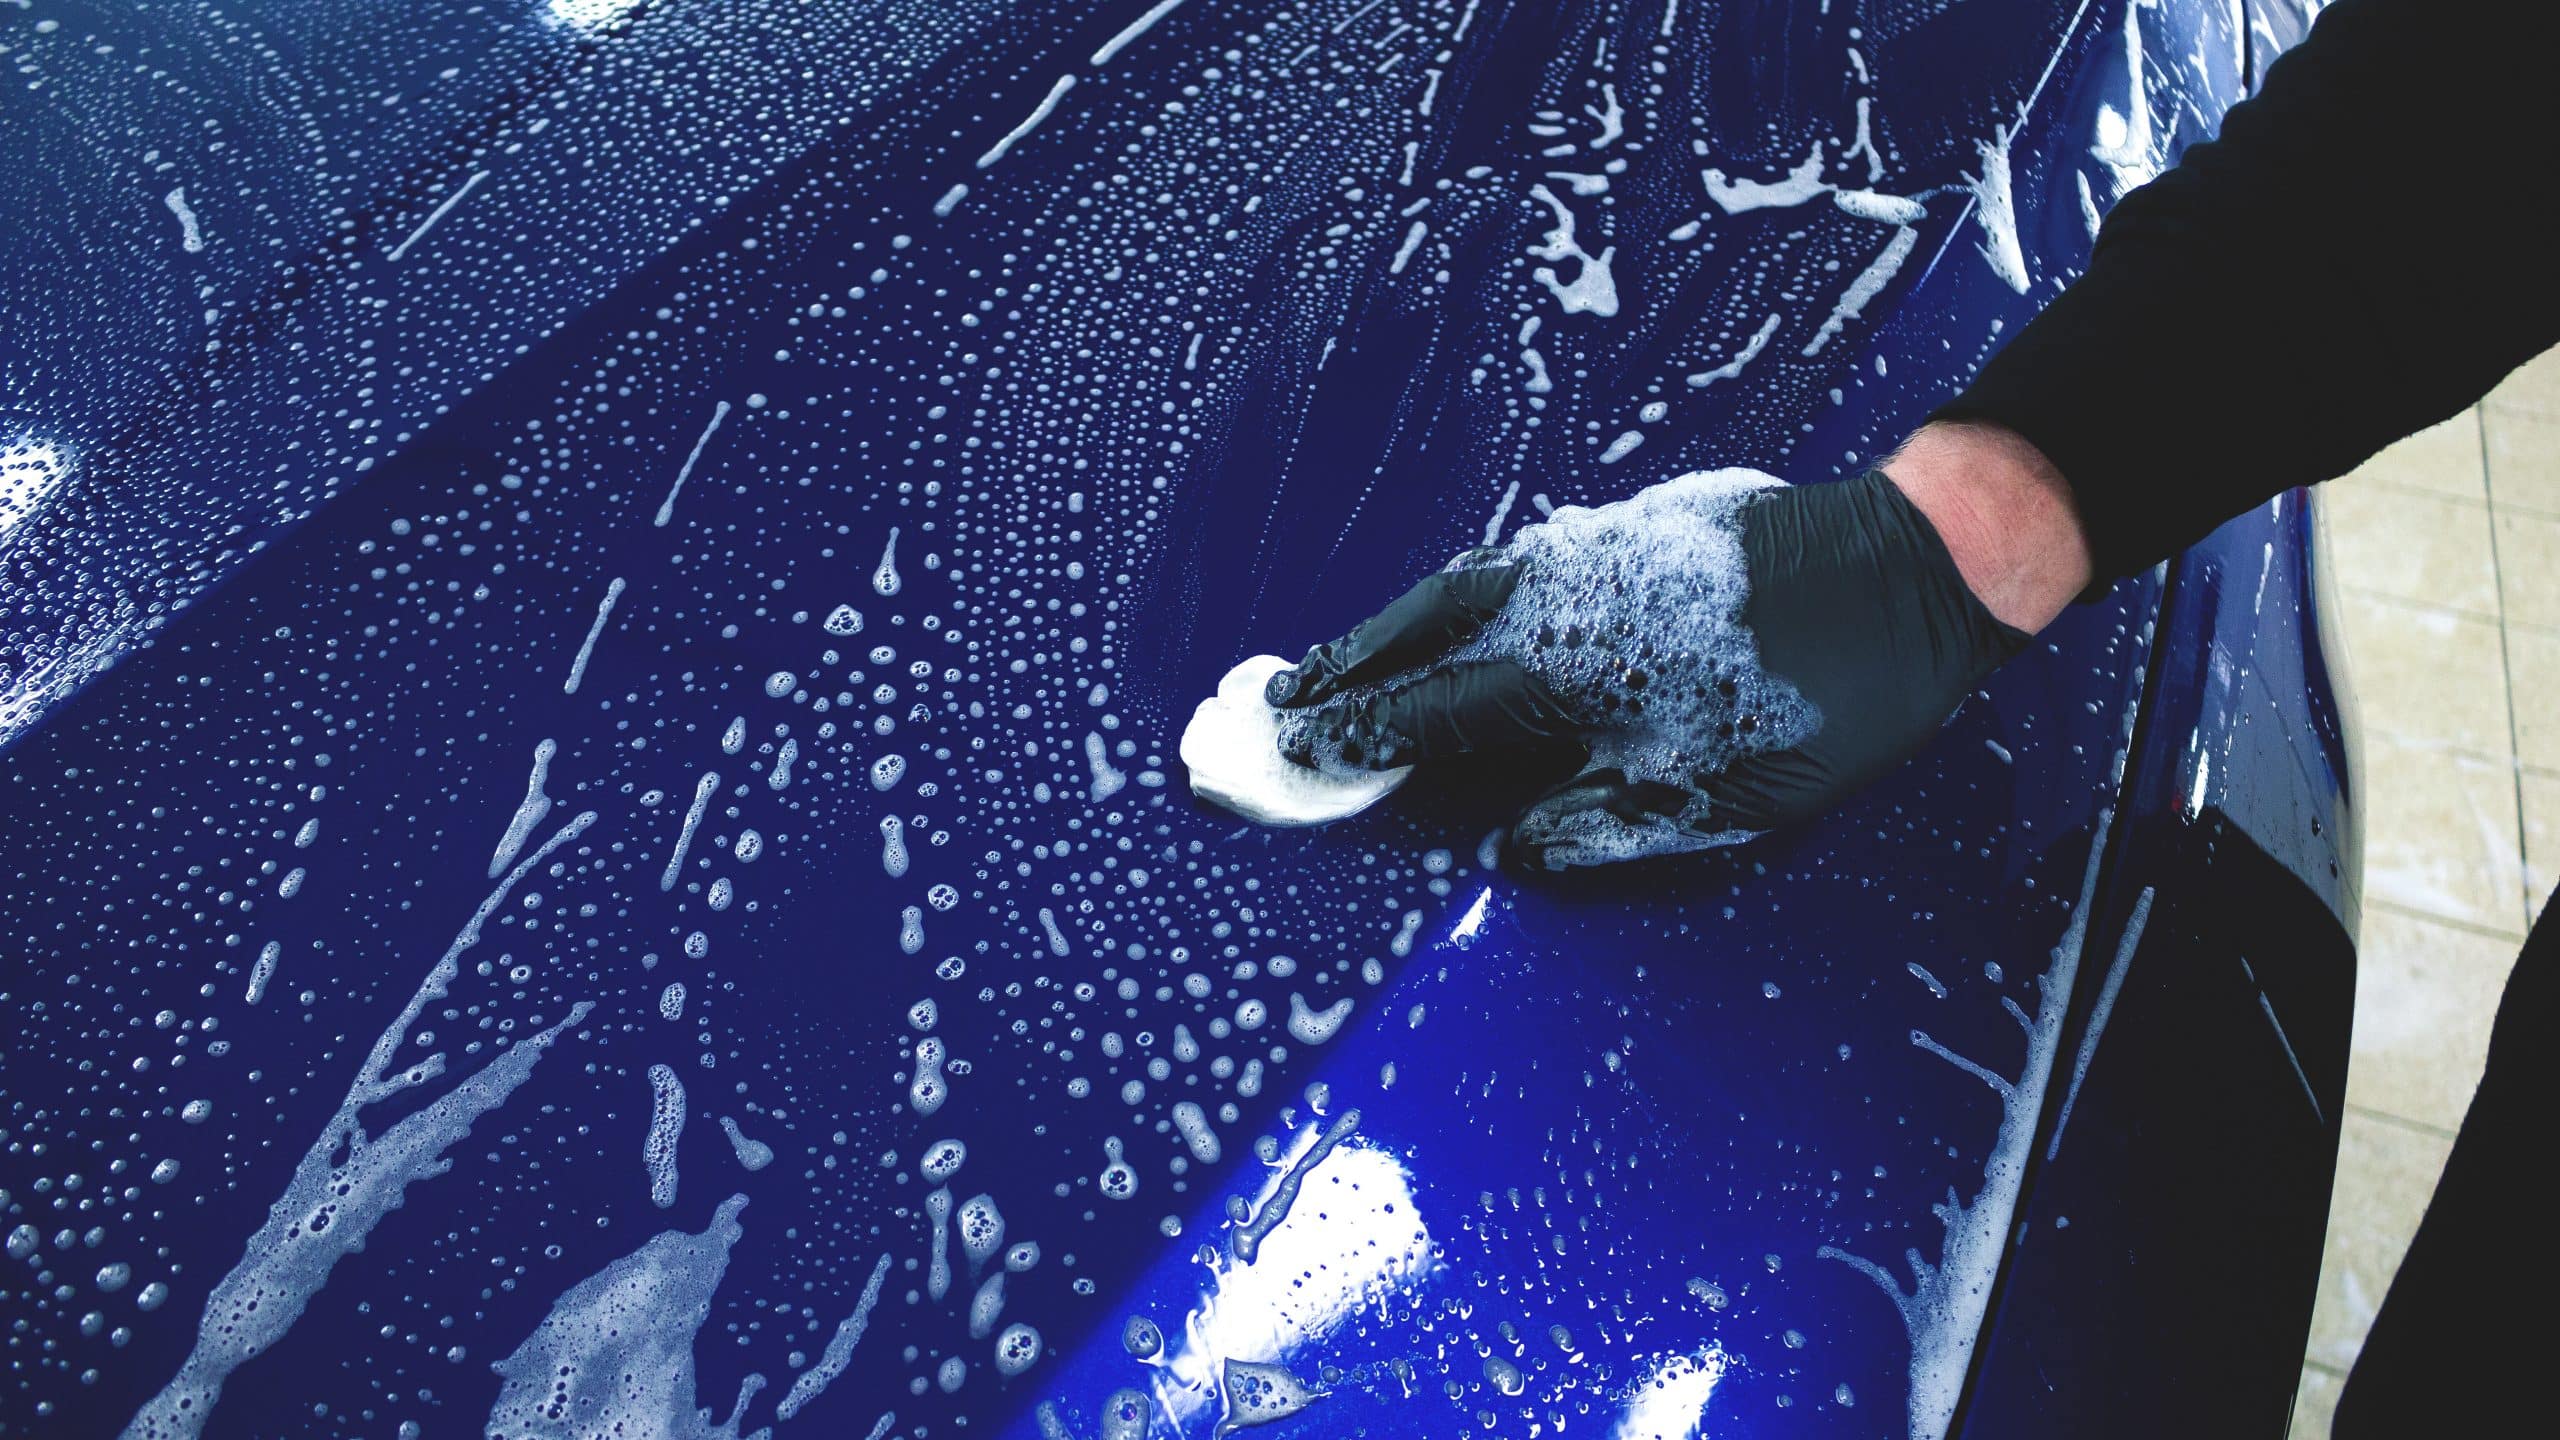
☐ Check car paint
As your car ages, you want to pay attention to its paint. Seemly innocent scratches, stone chips or dents can start to rust and eat through your car’s bodywork before you know it.
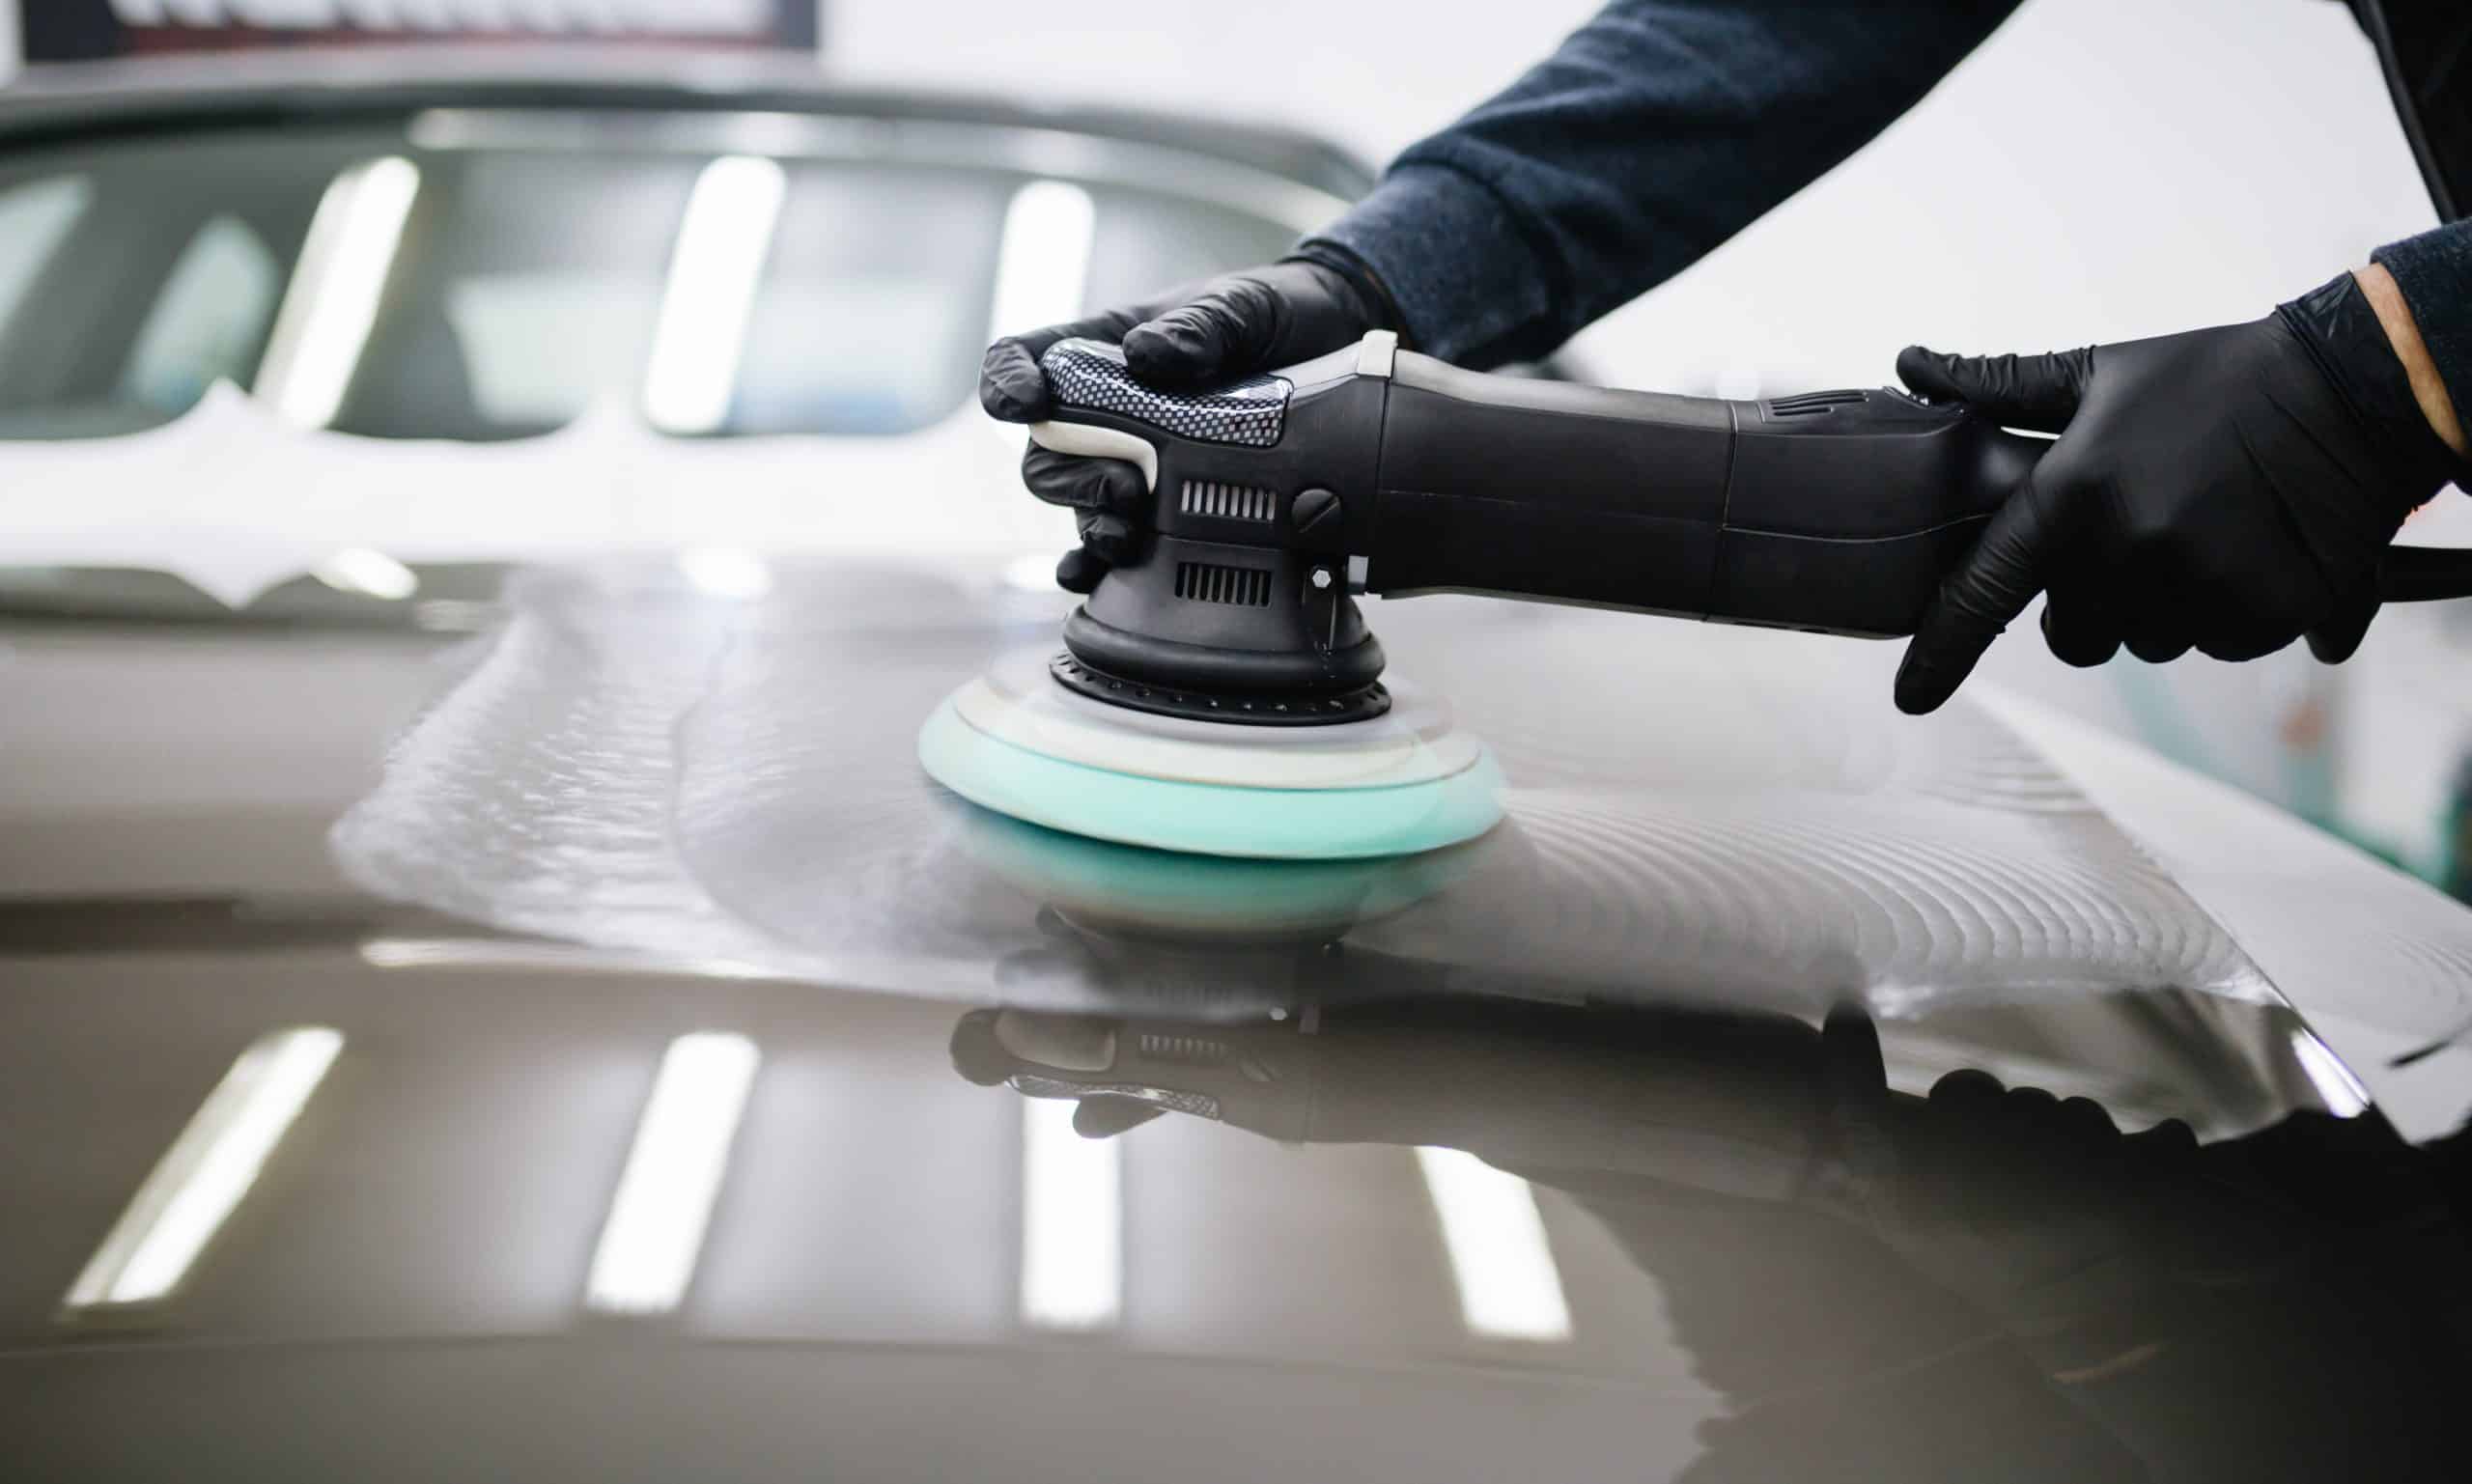
Touch up your car paint with a matching paint pen where needed so rust doesn’t get a chance. To make the new paint blend with the old, you can polish your car paint after flattening the paint correction with wet sandpaper. You can watch how it’s done in “How To Correct Paint Chips” on our YouTube channel.
Also check out our post “32 DIY Car Detailing Tips” for professional detailing tips and tricks to get your car looking its best.
Awesome Job!
Well, that’s it for now…
Don’t forget to schedule your car’s next maintenance according to which boxes you’ve checked and the ones you didn’t.
Remember: car maintenance is a never-ending process, but it can be very rewarding!
Keep up the good work!